Most people can install a video doorbell with basic tools, but the key is checking wiring, Wi-Fi, and placement first. Renters and HOA homes should also confirm the rules before drilling or mounting.
Installing a video doorbell can be a simple weekend project. Start by checking power, Wi-Fi, and placement.
The right setup helps you get clear alerts. It can also improve porch coverage and reduce privacy problems later.
Installing a Video Doorbell: What to Know Before You Start
Start by matching the doorbell to your home. Do not try to fit your home to the device.
The best choice depends on existing wiring, Wi-Fi strength, and your housing rules. Those rules may come from ownership, renting, or an HOA.
Wired vs. battery-powered video doorbells
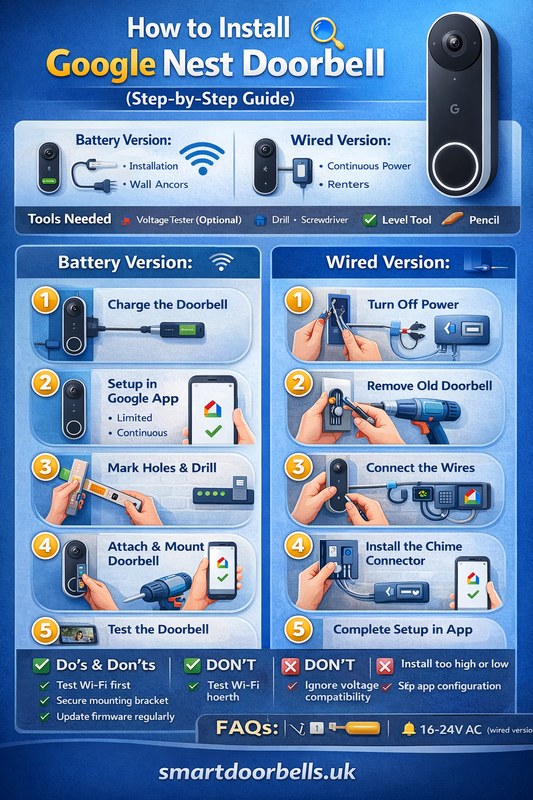
Wired models usually connect to existing doorbell wiring. They may also keep the battery charged.
Battery-powered models are often easier in rentals or homes without compatible wiring. They still need charging or battery swaps.
Wired setups can work better for busy entryways. They avoid regular charging.
Battery models can be easier for apartments, townhomes, and no-drill installs. They also help when the lease limits changes.
Advantages
Battery models often need less wiring work.
Wired models can reduce battery upkeep.
Limitations
Battery models need regular charging.
Wired models depend on compatible low-voltage power.
Homeowner, renter, and HOA considerations
Homeowners usually have the most freedom. They still need to check electrical and mounting safety.
Renters should review the lease before drilling, replacing hardware, or adding a no-drill mount.
HOAs may care about visible wiring, camera angle, or exterior changes.
If your building has shared entryways, think about app access, recordings, and notifications.
Tools, Materials, and Compatibility Checks
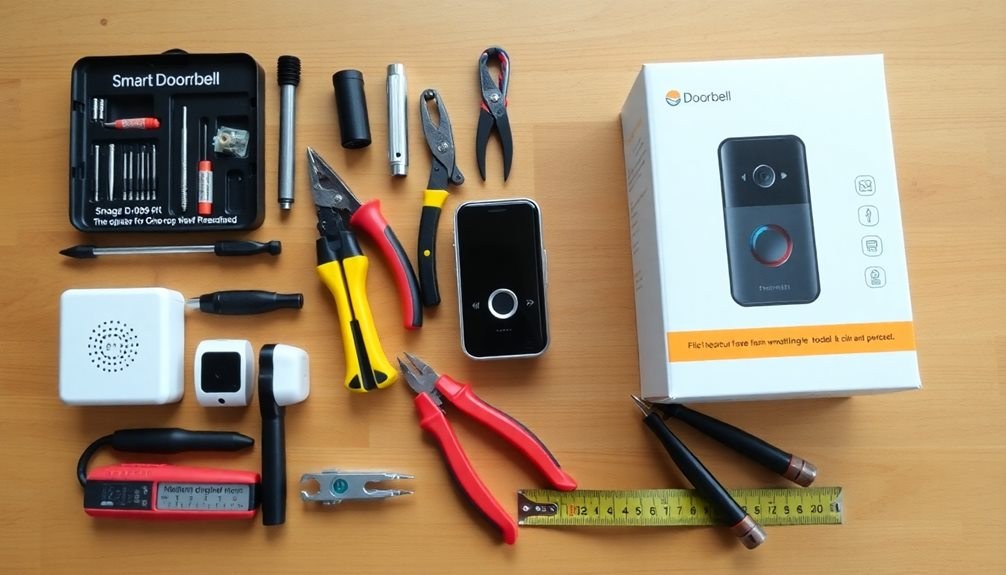
Essential tools and compatibility checks before installing a video doorbell.
Before you mount anything, gather the right tools. Also confirm the device will work with your home.
A few minutes of checking can prevent weak power, bad chime behavior, or app setup problems.
Doorbell transformer voltage, chime type, and existing wiring
If you are using a wired model, check the transformer voltage and the chime type first.
Many video doorbells need a specific low-voltage range. Some also need a power kit, bypass, or adapter to work correctly.
Inspect the existing wires for wear, corrosion, or loose ends. If the wiring looks damaged or the transformer rating is unknown, do not guess.
Wi-Fi strength, 2.4 GHz vs. 5 GHz, and app/account requirements
Video doorbells need a stable Wi-Fi signal where they are mounted. Many models use 2.4 GHz Wi-Fi because it reaches farther through walls.
Some also support 5 GHz for faster local links.
Check the app requirements before you start. Some devices need a phone with a current operating system, a vendor account, and a working email address or phone number for setup and recovery.
Choose the Best Mounting Location for Coverage and Privacy
Placement affects video quality, motion alerts, and neighbor privacy. A good location sees visitors clearly.
It should not record too much of the street, sidewalk, or next-door property.
Viewing angle, porch layout, and motion detection range
Mount the doorbell where it can see faces at the door and packages near the threshold.
The best height depends on the model, porch depth, and whether the camera needs a wedge or corner mount.
If the porch is deep or the entry is offset, the default angle may miss visitors standing too close.
Motion zones can help, but the camera still needs a clear line of sight.
Night vision, glare, weather exposure, and neighbor privacy zones
Strong porch lights, glass doors, and direct sun can cause glare. Night vision can also be affected by reflections from walls, windows, or nearby cars.
Try to aim the camera at your entry area, not a neighbor’s door or yard.
If the model offers privacy zones, use them to block areas you do not need to record.
Step-by-Step Installation Process<
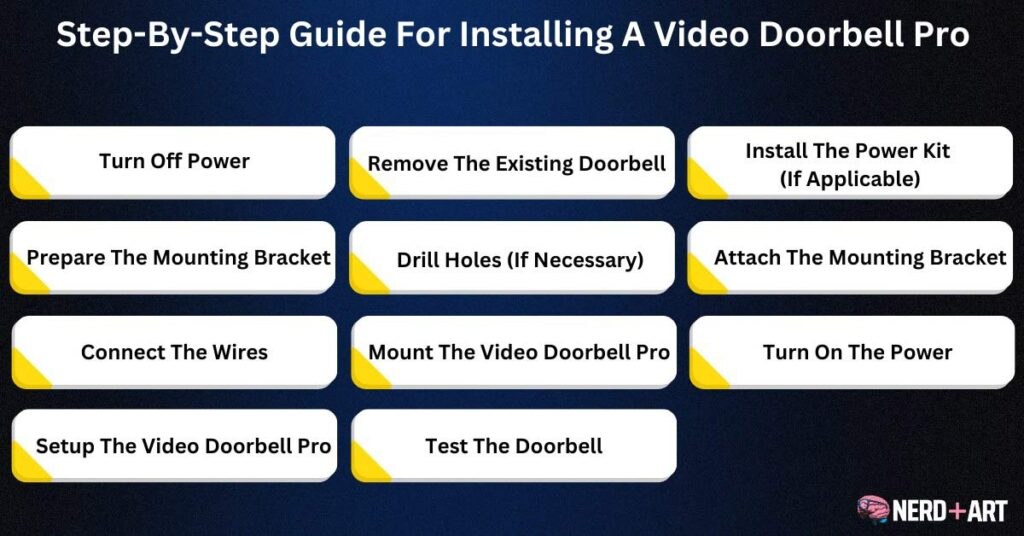
A video doorbell installation process is shown step by step.
Most installs follow the same basic pattern. Shut off power, remove the old doorbell, mount the new bracket, connect power, and finish setup in the app.
The exact steps still depend on the model. Follow the manual closely.
Turning off power and removing the old doorbell
For wired installs, turn off power at the breaker before touching the doorbell wires.
Then test the old button and chime to confirm the circuit is off.
Remove the old button carefully. Keep the wires from slipping back into the wall.
If the wires are short, frayed, or hard to reach, stop and get help.
Mounting the bracket, connecting wires, and securing the device
Hold the bracket in place and mark the holes only after checking the camera angle.
Use the correct anchors or screws for wood, brick, stucco, or siding.
Attach the wires to the terminals as the manual shows. Do not let the wire ends touch each other or the wall surface if the instructions warn against it.
After the bracket is fixed, secure the doorbell body and make sure it sits level.
A loose mount can cause vibration, poor video, or water entry.
Charging, syncing, and completing in-app setup
Battery models usually need a full charge before setup. Wired models may still need app pairing, firmware updates, and a chime or power-kit check.
During app setup, connect the device to your account and name it clearly. Then test live video.
If the app asks for shared access, only invite people who truly need it.
1
Confirm requirements
Verify the exact model, power, network, storage, placement, household, rental, and platform requirements.
2
Plan safe placement
Consider privacy, field of view, weather, height, doors and windows, wiring, and emergency access.
3
Install and secure
Follow the exact manual, update firmware, use a unique password, and enable MFA.
4
Test and maintain
Test alerts, recording, outage behavior, batteries, users, permissions, and backup procedures.
Set Up Alerts, Storage, and Video Settings
Installation is not finished until the alerts and storage settings are right. These options shape how often you get notified.
They also affect how much video is saved and what happens if the internet goes down.
Motion zones, activity zones, and notification sensitivity
Motion zones let you focus alerts on the areas that matter most.
Activity zones, privacy zones, and sensitivity controls can reduce false alerts from cars, trees, pets, or passing neighbors.
Start with medium sensitivity, then adjust after a few days.
Too many alerts can make people ignore important ones.
Cloud storage, local storage, subscriptions, and retention limits
Some doorbells save clips to the cloud. Others use local storage such as a hub, card, or base station.
Cloud plans often add longer retention or smart alerts. They also depend on the vendor’s servers and account access.
If you are comparing storage styles, a local system may work well for some homes. Cloud storage may fit others better.
Local Storage
Explain hardware, capacity, access, backup, and theft risks.
Cloud Storage
Explain plan cost, retention, internet dependence, account access, and provider controls.
Security, Privacy, and Cybersecurity Basics
A video doorbell is part camera, part account, and part network device. Good passwords, privacy settings, and update habits matter just as much as the hardware.
Account protection, multi-factor authentication, and shared user access
Use a unique password for the account and turn on multi-factor authentication if the app supports it. MFA adds another check when someone signs in from a new device.
Review shared users often. Remove old household members, guests, or contractors when they no longer need access.
Privacy settings, audio recording, and data handling choices
Check whether the doorbell records audio, not just video. Audio rules can matter in shared homes, apartments, and multi-unit buildings.
Also review retention, deletion, and export options.
Troubleshooting Common Installation and Connectivity Problems
If the doorbell does not work right away, start with safe, reversible checks. Many issues come from power, Wi-Fi, or setup steps that were skipped during installation.
Power issues, chime problems, and transformer limitations
If the device does not power on, recheck the breaker, wire connections, and transformer compatibility.
Some chime problems come from using the wrong power kit or from a transformer that cannot supply enough power.
If the chime rings weakly, sounds odd, or does not ring at all, consult the manual before bypassing anything.
A mismatch between the chime and the doorbell is common and usually fixable.
Weak signal, dropped video, delayed alerts, and firmware updates
If video lags or alerts arrive late, move the router closer, improve mesh coverage, or reduce interference.
Thick walls, metal doors, and exterior distance can all weaken the signal.
Keep the app and firmware updated. If problems continue after updates and signal checks, the issue may be model-specific or network-related.
A doorbell camera needs occasional care to stay reliable. The ongoing work is usually light.
It still affects performance, privacy, and total cost over time.
Battery care, cleaning the lens, and weather-related wear
Battery-powered models need a charging routine that fits your household.
If the battery drains faster than expected, check motion settings, Wi-Fi strength, and weather exposure.
Wipe the lens gently so dust, pollen, and spider webs do not blur the image.
In hot, cold, wet, or windy areas, check the mount and housing more often.
Subscription costs, replacement parts, and long-term support lifecycle
Ownership cost is more than the device price. Add in mounts, wedges, replacement batteries, optional cloud plans, and any professional installation fees.
Also check how long the vendor supports the model with app updates and security fixes.
A lower upfront price may not stay low if the plan or support terms change later.
Final Takeaway
Installing a video doorbell is usually straightforward when power, Wi-Fi, and placement are checked first. For homeowners and renters alike, the safest next step is to confirm compatibility in the manual, then set up privacy, alerts, and account security before daily use.
Not always. Battery-powered models can work without existing wiring, while wired models usually need compatible low-voltage doorbell wiring and a suitable transformer.
Many video doorbells work best on 2.4 GHz because it usually reaches farther through walls. Check the exact model because some also support 5 GHz or need a hub.
It depends on the model and setup. Battery models may still detect motion locally, but live video, cloud alerts, and remote access often need power and internet.
Some do and some do not. A subscription may unlock cloud storage, longer retention, or advanced alerts, while basic live viewing or local storage may work without one.
Aim the camera at your own entry area, not a neighbor’s property. Use privacy zones, review audio settings, and limit shared account access to people who need it.
Check the transformer voltage, chime type, wiring condition, Wi-Fi strength, and lease or HOA rules first. If any of those are unclear, a qualified installer can help avoid damage or unsafe wiring.
Hi, I'm Marcus Sterling, a smart home security expert with over 5 years
of hands-on experience testing and reviewing hundreds of security cameras, smart locks, and alarm systems. My mission is to make smart home security accessible, affordable, and easy to understand—and every review I publish is 100% independent, unbiased, and honest. I don't accept payments for positive reviews, just practical advice to help you secure your home with confidence.
A video doorbell can show us who is at the door, record activity outside, and send alerts to our phones. These devices can improve awareness around a home, but their usefulness depends on clear video, reliable motion detection, and an app that makes alerts easy to manage. The eufy Video Doorbell E340 is a battery-powered…
The eufy Video Doorbell E340 supports several chime options, but compatibility depends on the setup you choose. You can use an existing wired chime, a compatible eufy add-on chime, supported HomeBase models, Alexa devices, or Google Assistant devices. For the simplest wireless setup, use the official eufy Add-On Chime, while wired installations require a 16–24…
Quick Security Answer A Google Nest Doorbell is usually easiest to install when you confirm power, Wi-Fi, and placement first. Wired models need compatible low-voltage wiring, while battery models are often better for renters or simpler installs. The Google Nest Doorbell Installation Guide below helps beginners check power, Wi-Fi, placement, privacy, and app setup before…
Quick Security Answer Ring and Nest can coexist, but they usually do not act like one fully unified system. Expect limited integration through Google Home features, not full native Nest-style control. Does ring video doorbell work with nest is a common question for mixed smart homes. The short answer is sometimes, but not as a…
Quick Security Answer A Ring battery doorbell is usually a practical DIY install for many homes and rentals. The key is to check Wi-Fi strength, mounting rules, and privacy settings before drilling. installing ring battery doorbell is usually a straightforward DIY task for many US homes and rentals. The best result depends on placement, Wi-Fi,…
Quick Security Answer A Ring battery doorbell is a practical choice if you want front-door alerts without existing wiring. The best results come from careful placement, solid Wi‑Fi, and the right privacy and storage settings. The ring battery doorbell guide below explains what to expect before you buy, mount, or set up a battery-powered video…