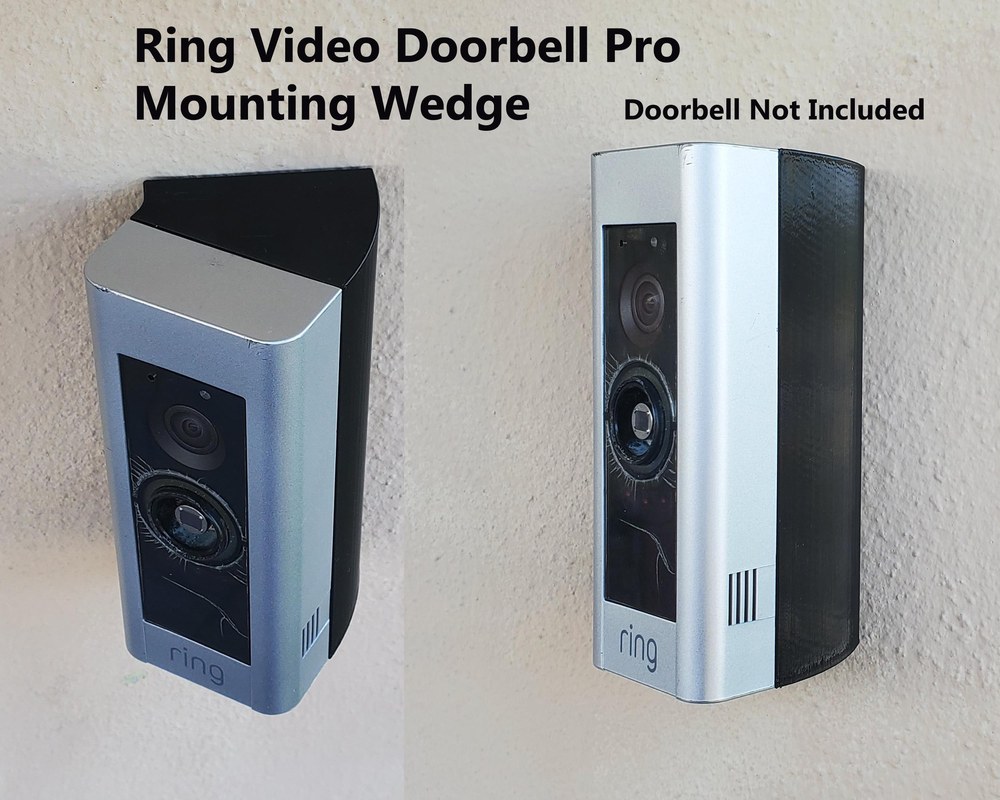
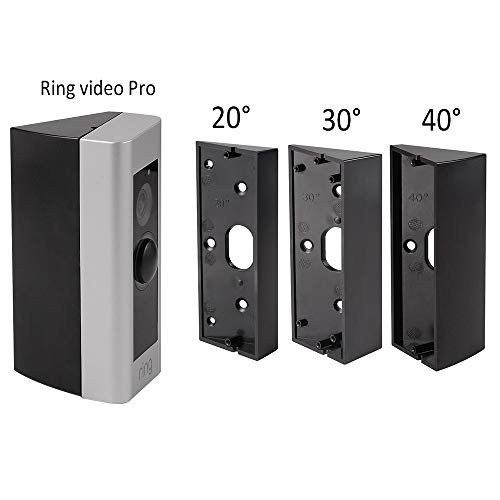
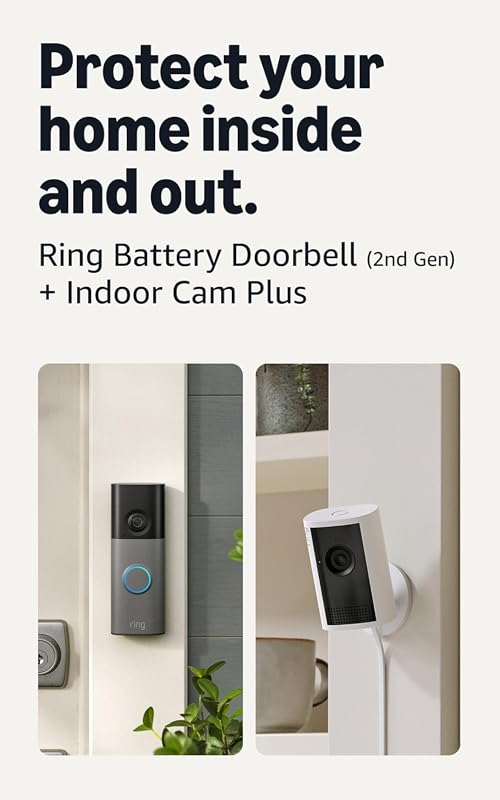
A corner kit can help a Ring video doorbell face the approach path better when the door sits near a wall or tight corner. It is most useful when you also verify wiring, Wi-Fi, privacy settings, and rental rules first.
A corner kit ring video doorbell setup helps a doorbell camera face visitors more directly. It is useful when the door sits near a wall, trim, or angled entry. The right mount can improve video coverage. It also changes wiring needs, motion detection, and privacy, so placement matters before you drill.
Corner Kit Ring Video Doorbell Setup: What It Does and When You Need It
A corner kit is a wedge-style bracket. It shifts the doorbell left or right. It helps when a flat mount points too much at a wall or misses the approach path. That extra angle can help the camera see more of a porch, steps, or walkway.
Before You Install: Check Doorway Angle, Wiring, and Wi‑Fi Coverage
Check doorway angle, wiring, and Wi-Fi coverage before installing the doorbell.
Start by checking whether the doorway, power, and network can support the install. A corner mount can fix a poor viewing angle. It cannot solve weak Wi-Fi, unsafe wiring, or a bad transformer. Confirm those basics first.
How corner mounting changes the field of view and motion detection
Corner mounting changes what the camera sees at the edge of the frame. That can help when the visitor stands off-center or when a wall blocks part of the view. It can also move motion zones. The doorbell may detect sidewalk traffic differently.
If the camera points too far left or right, you may lose part of the doorway. You may also over-capture public space. That is why motion settings should be checked after the mount is secured.
Power options, transformer limits, and battery considerations
Ring video doorbells may be wired, battery powered, or both, depending on the model. A corner kit does not change the doorbell’s power needs. But the installation can affect cable bend space and access to the mounting surface. For wired models, verify the exact transformer and chime requirements in the manual.
Battery models are easier for renters and some apartments. They still need regular charging. If the doorbell is under a tight overhang or near a hard-to-reach corner, plan for battery removal before you mount it.
Apartment, condo, and rental restrictions to review first
Renters should check lease rules, building policies, and local property limits before drilling. Some landlords allow a no-drill mount or adhesive option. Others require written approval for exterior changes. Condo boards and HOAs may also limit camera placement.
How to Install a Corner Kit Ring Video Doorbell on Most Entryways
Most installs follow the same pattern. Choose the angle, mount the bracket, attach the doorbell, then finish setup in the app. The exact steps vary by model, so follow the product manual for screw type, wire order, and bracket orientation. If you need a wiring refresher, our video doorbell wiring guide can help explain the basics.
Choosing the left or right orientation for your porch layout
Pick the direction that aims the lens toward the approach path, not the wall. For a left-side entry, a right-facing wedge may help the camera see visitors sooner. For a right-side entry, the opposite may be true.
Stand where a visitor would approach and imagine the camera view. You want the face, package drop area, and steps in frame. Do not aim too far into the street.
Mounting steps, leveling, and securing the bracket
Use the template that comes with the doorbell or kit, and mark the holes carefully. Hold the wedge bracket in place before drilling. Small errors at this stage can tilt the camera enough to hurt motion detection.
Level the bracket if the manual calls for it. Then tighten the fasteners without stripping them. If the surface is uneven, use the included spacers or anchors as directed. For wired setups, turn off power at the breaker before touching conductors.
1
Confirm requirements
Verify the exact model, power, network, storage, placement, household, rental, and platform requirements.
2
Plan safe placement
Consider privacy, field of view, weather, height, doors and windows, wiring, and emergency access.
3
Install and secure
Follow the exact manual, update firmware, use a unique password, and enable MFA.
4
Test and maintain
Test alerts, recording, outage behavior, batteries, users, permissions, and backup procedures.
Final app setup, live view check, and motion zone adjustment
After mounting, connect the device in the app and confirm live view. Check that the picture is level. Make sure the visitor stands in frame. Also check that the porch light does not wash out the image. Then adjust motion zones so the camera focuses on your property.
This is also the time to test notifications. Walk the normal approach path, ring the bell, and check whether alerts arrive quickly. If the app offers motion sensitivity controls, start low and adjust slowly.
Placement Tips for Better Video, Audio, and Night Performance<
Proper placement improves video, audio, and night performance.
Good placement matters as much as the doorbell itself. A corner kit can improve the angle. But glare, noise, and weather can still affect results. The best setup sees visitors clearly, hears them well, and avoids unnecessary public coverage.
Reducing blind spots, glare, and head-on sun exposure
Try to avoid direct afternoon sun and strong porch lights aimed at the lens. Glare can wash out faces and make night switching look harsh. A slight angle change or a small shade from the overhang may help.
Also check for blind spots near stairs, railings, or package drop areas. If the camera misses the first step or the bottom of the porch, adjust the wedge or height before you finish the install.
Improving two-way talk pickup and reducing street noise
Two-way talk works better when the microphone faces the visitor, not the street. A corner kit can help by turning the mic toward the porch. That said, traffic, fans, and wind can still interfere.
Keep the doorbell away from loud vents or direct road noise when possible. If the app has audio settings, test them at different times of day. Sound can change a lot between a quiet morning and a busy evening.
Adjusting motion sensitivity for sidewalks, stairs, and driveways
Motion sensitivity should match the entry layout. A sidewalk close to the porch may trigger too often. A long driveway may need a larger motion zone or a different angle.
For homes with stairs, aim the camera so it catches the full approach. For rentals or shared buildings, keep the zone tight enough to avoid recording neighbors more than needed.
Compatibility, Power, and Network Requirements to Confirm
Before buying a corner kit, confirm that it fits the exact Ring model and the way your home is wired. The bracket itself may be simple. The doorbell still depends on the right power, Wi-Fi band, and chime setup. For wired installations, our Ring wired installation diagram guide can help explain the basic layout.
Wired versus battery models and what the corner kit changes
A corner kit changes the angle, not the core function. Wired models usually stay powered through existing doorbell wiring, while battery models rely on charging. The bracket should not interfere with charging access or wire clearance.
If the doorbell is battery powered, make sure you can remove it without scraping the wall or wedge. If it is wired, make sure the wires are long enough to reach the terminals without tension.
2.4 GHz Wi‑Fi range, router placement, and mesh network considerations
Many video doorbells rely on 2.4 GHz Wi-Fi because it reaches farther than 5 GHz. That band can be slower, but it often works better through walls and exterior doors. Still, signal quality matters more than theory.
If your router is far from the entry, a mesh node or access point may help. Place it where it improves the doorbell signal without creating a weak link elsewhere in the home.
Doorbell chimes, hubs, and existing home wiring compatibility
Some models work with a mechanical chime, digital chime, or app alert only. Others need a connector, power kit, or bypass. Check the exact compatibility list before removing the old button.
If you already have a home hub or smart speaker setup, verify what features are supported. Voice announcements, chime tones, and smart displays may require extra setup or a plan.
Privacy, Security, and Neighbor-Friendly Camera Settings
Doorbell cameras can help you watch your own entry, but they also capture parts of the public space. That makes privacy settings important. Use the app to limit what the camera records and who can access it.
Setting privacy zones and limiting recording to your property
Privacy zones let you block parts of the image, such as a neighbor’s porch or a public sidewalk. Motion zones can also reduce alerts from areas you do not need to watch. Set both carefully after installation.
Remember that audio and video rules can vary by state and location. If you are unsure about recording neighbors or shared spaces, check local rules or get legal guidance.
Account security, shared users, and app permissions
Use a unique password and turn on multi-factor authentication, or MFA, if the service offers it. That adds a second sign-in step and helps protect the account if a password is leaked. Review shared users often, especially in multi-person homes.
Only grant access to people who need it. If someone leaves the household, remove their access and review the app’s linked devices and integrations.
Data retention, cloud storage, and local privacy expectations
Some doorbells store clips in the cloud, while others support local storage, depending on the model and plan. Cloud storage depends on the vendor’s servers and account access. Local storage may reduce subscription dependence, but it can still be lost if the device is stolen.
Local Storage
Explain hardware, capacity, access, backup, and theft risks.
Cloud Storage
Explain plan cost, retention, internet dependence, account access, and provider controls.
Check how long clips stay available, how to delete them, and whether you can export recordings. Those details matter if you later move, sell the home, or change brands.
Subscription, Storage, and Ownership Costs in 2026
Ownership cost is more than the box price. You may also pay for cloud storage, accessories, replacement batteries, or professional installation. The right setup depends on how much history, sharing, and alert detail you want.
US Price & Subscription
Typical device priceAdd a current verified USD price or range
Accessories or installationAdd verified extras
Cloud planRequired / Optional / Not offered
Professional monitoringRequired / Optional / Not offered
ContractVerify current terms
What features typically depend on a Ring plan
Plan features can change, so verify the current plan page before you buy. In many cases, cloud video history, extended event access, and some advanced alerts depend on a subscription. Without a plan, the app may still show live view and basic notifications, but not full history.
One-time hardware costs versus ongoing subscription value
A one-time hardware purchase may be enough for simple live alerts. But if you want stored clips, easier sharing, or event review, a plan may add value. The best choice depends on how often you expect to use the recordings.
Without a Plan$0
Add verified included features
Add verified limitations
Monthly PlanAdd verified price
Add verified cloud and alert features
Add retention and device limits
Annual PlanAdd verified price
Add verified savings
Add cancellation terms
How long-term costs change for homeowners and renters
Homeowners often care more about long-term storage, wiring, and multiple entry points. Renters often care more about no-drill mounting, easy removal, and avoiding extra hardware. Both should think about the cost of replacement parts and battery charging time.
Troubleshooting Common Corner Kit and Doorbell Problems
Most problems come from simple causes. Weak signal, poor angle, loose mounting, or the wrong settings are common. Start with safe checks first. If the issue involves wiring, power, or damaged hardware, stop and follow the manual or call a qualified professional.
Weak Wi‑Fi, offline alerts, and delayed notifications
If the doorbell goes offline, first check the router, power source, and app status. Move closer to the entry with your phone and test the signal. If other devices are slow too, the issue may be the network, not the doorbell.
Delayed alerts can also come from battery saver settings, weak upload speed, or app permissions. Confirm that notifications are allowed on the phone and that the app can run in the background.
Misaligned motion detection, distorted video, and poor angle coverage
If motion alerts miss visitors, the wedge may be pointing too far away from the approach path. If the image looks stretched or cuts off faces, the mount angle may be too steep. Recheck the bracket before changing advanced settings.
For distorted video at night, look for glare from porch lights or reflective trim. A small angle change can improve the image more than a higher sensitivity setting.
Loose mounting, weather exposure, and seasonal performance issues
Loose screws or uneven siding can make the camera shift over time. Check the mount after a few days and again after a season of hot or cold weather. Exterior hardware can settle as temperatures change.
If the unit sits in direct rain or snow, confirm that the exact model and install location match the manufacturer’s weather guidance. Do not assume one model’s rating applies to another.
Maintenance and Next Steps After Installation
After the doorbell is up, a little upkeep keeps it useful. Clean the lens, check the screws, and review app settings from time to time. Small maintenance steps help prevent missed clips and weak alerts.
Cleaning the lens, checking fasteners, and updating firmware
Wipe the lens with a soft, dry cloth. Avoid harsh cleaners that could damage the cover. Then check that the bracket and screws still feel snug.
Also update firmware and the mobile app when updates are available. Updates can improve stability, fix bugs, and support security changes.
When to revisit placement or upgrade wiring, chimes, or network gear
Revisit placement if you add a storm door, change porch lights, or move furniture near the entry. Those changes can affect both video and motion detection. A small layout change may call for a new angle.
You may also need a better chime, a stronger Wi-Fi node, or updated wiring if the doorbell drops offline often. If the entry setup becomes more complex, review the manual again before making changes.
Final Takeaway
A corner kit ring video doorbell setup works best when the entryway sits at an angle or near a wall. It can improve view, motion detection, and visitor coverage. But wiring, Wi-Fi, privacy settings, and rental rules must come first.
You usually need one when the doorway is angled or a wall blocks part of the camera view. If the door already faces the approach path well, a flat mount may be enough.
Yes, because the camera points in a new direction. You may need to adjust motion zones and sensitivity after installation.
Renters can sometimes use a no-drill or removable option, but they should check lease and building rules first. Permanent drilling may need written approval.
The bracket does not change the doorbell’s power needs, but it can affect wire clearance and access. Wired models still need the correct transformer and chime compatibility.
Many models rely on 2.4 GHz Wi-Fi because it reaches farther through walls. A strong signal at the entry is more important than router speed alone.
It depends on the current plan and model. Some features may work without a plan, but stored video history and advanced alerts often depend on subscription terms.
Hi, I'm Marcus Sterling, a smart home security expert with over 5 years
of hands-on experience testing and reviewing hundreds of security cameras, smart locks, and alarm systems. My mission is to make smart home security accessible, affordable, and easy to understand—and every review I publish is 100% independent, unbiased, and honest. I don't accept payments for positive reviews, just practical advice to help you secure your home with confidence.
Quick Security Answer A video doorbell can use very little data when it only sends occasional alerts, or a lot when it records often and you watch live video. Your monthly usage depends most on motion settings, video quality, and how busy the front door is. How much data does a video doorbell use depends…
Compare ring battery doorbell no drill mount for home coverage, privacy, power, storage, subscriptions, and value. Read the guide before choosing a system.
Blink Outdoor 4 and Ring outdoor cameras take different approaches to home security. Blink focuses on low cost, long battery life, and simple operation, while Ring offers more camera choices, stronger detection tools, and a broader smart home system. Choose Blink Outdoor 4 if you want an affordable camera with long battery life and optional…
Quick Security Answer The Ring Battery Doorbell Plus is easiest to set up when you charge it first, pair it in the app, then mount it after testing the view. It works best with solid 2.4 GHz Wi-Fi, careful placement, and the current subscription terms you verify before buying. The ring battery doorbell plus manual…
View on Amazon Quick Security Answer Privacy mode is a camera setting that blocks the lens or disables recording so the camera stops capturing video. Use it for guests, service visits, and private moments, but remember it does not delete old footage or secure your account. Smart Home Security Guide What does privacy mode mean…
Compare ring battery doorbell bundle by security features, privacy, smart home fit, setup, fees, and value. Read the guide to find the right option for your.