A Google Nest Doorbell is usually easiest to install when you confirm power, Wi-Fi, and placement first. Wired models need compatible low-voltage wiring, while battery models are often better for renters or simpler installs.
The Google Nest Doorbell Installation Guide below helps beginners check power, Wi-Fi, placement, privacy, and app setup before they start.
It is for U.S. homeowners and renters who want a safe, practical install.
Google Nest Doorbell Installation Guide: What Beginners Need to Know First
Start by matching the doorbell type to your home.
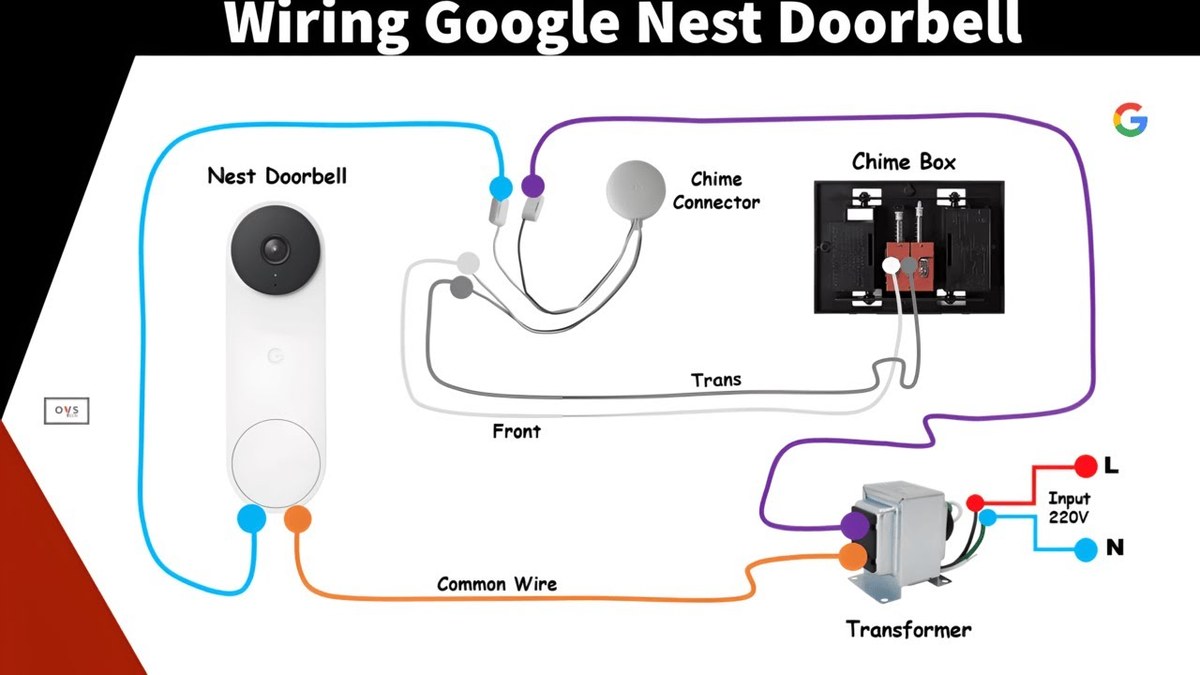
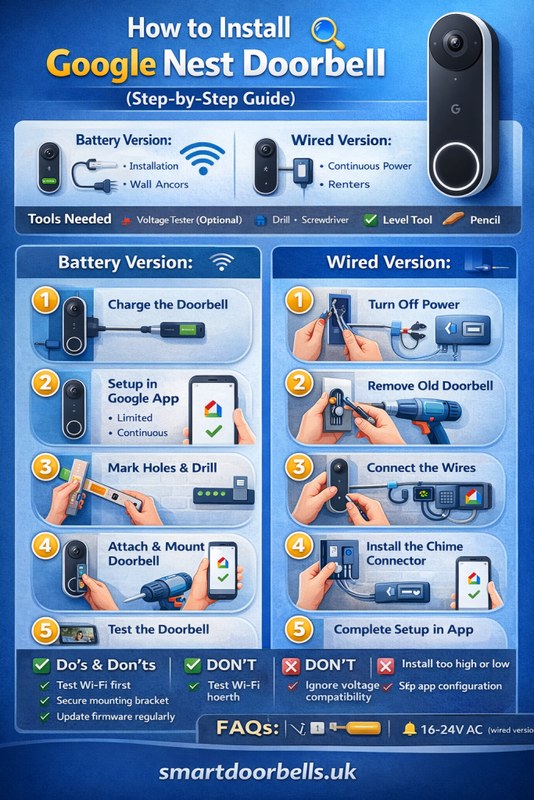
A wired setup works best with a compatible low-voltage doorbell circuit. A battery model is usually simpler for renters or homes without wiring.
Quick answer: wired vs. battery setup, and which one fits your home
Choose wired if you want continuous power.
Choose it only if you already have a doorbell transformer and chime. Choose battery if you want fewer wiring concerns or cannot modify the entryway.
If you are unsure, compare your current setup with the exact model manual before buying tools or drilling holes.
Set Up the App, Alerts, and Shared Access the Right Way
The app is where you control alerts, privacy, and household access.
Good setup here matters just as much as the physical install.
Account setup, multi-factor authentication, and recovery planning
Use a strong, unique password and turn on multi-factor authentication if the platform offers it.
Also save recovery codes or backup options in a secure place.
This matters because the account controls video access, device settings, and sharing.
If you lose access to the account, you may also lose access to recordings and settings.
Notification settings, familiar faces, activity zones, and sound detection options
Start with basic motion alerts, then narrow them after a few days if you get too many alerts.
Activity zones can help focus on the porch, while familiar face tools may reduce repeated alerts from regular visitors where supported.
Sound detection can be useful, but it can also add noise.
Keep only the alerts your household will actually use.
Guest access, shared users, and permission limits for family or renters
Shared access helps families, caregivers, and roommates manage the doorbell without sharing one password.
Use the least access needed, and remove users who no longer need entry.
Renters should confirm who controls the account when they move out.
If the device stays with the property, the owner should control the main account and device ownership.
Understand Storage, Subscriptions, and Ownership Costs
Before you commit, understand what comes with the device and what may require a paid plan.
The total cost includes hardware, possible accessories, and any cloud features you want to keep.
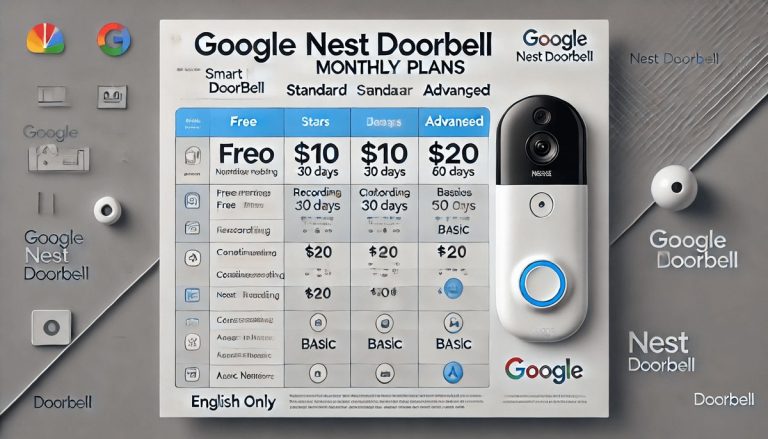
What works with local features and what requires a Nest Aware subscription
Some features may work without a subscription, while others depend on the current plan.
Because plan details can change, verify the live Google support page for the exact model before you buy.
Do not assume every alert, clip, or history feature is included.
Subscription terms can vary by device generation and region.
Cloud event history, video retention, and alert history explained
Cloud storage usually means clips or event history are saved online for later viewing.
That can be helpful if you miss a live alert, but it also depends on internet access and account security.
Retention means how long recordings stay available.
Check the current plan page for the exact retention window and device limits.
Local Storage
Can keep recordings on hardware you control.
May reduce dependence on a cloud plan.
Can still be lost if the device is stolen or damaged.
Cloud Storage
Stores clips online and may simplify access.
Usually depends on a paid plan and internet service.
Account security and retention rules matter more.
Upfront costs, optional subscription costs, and long-term ownership value
Think about the full ownership picture, not just the box price.
Add the cost of mounting parts, chime accessories, possible professional installation, and any ongoing plan.
For a cost-focused comparison, DecatHome’s video doorbell subscription guide explains how recurring plan costs can affect long-term value for similar devices.
Protect Your Camera and Home Network: Privacy and Cybersecurity Setup
Video doorbells sit at the edge of your home network and your front door.
That makes privacy and cybersecurity part of the installation, not an afterthought.
Securing your Google account, app permissions, and connected devices
Review which devices are signed in to the account and remove anything you do not recognize.
Also check app permissions for microphone, camera, location, and notifications.
If the doorbell connects to other smart devices, make sure each linked account is still needed.
Fewer connections usually mean fewer weak points.
Firmware updates, password hygiene, and router security best practices
Install firmware updates when available, and keep the app current on every phone or tablet that uses it.
Update your router too, since a weak home network can affect the whole system.
Use WPA2 or WPA3 if your router supports it, and avoid simple passwords.
If you have older smart devices, consider placing them on a separate network when practical.
Using privacy zones, motion limits, and respectful recording boundaries
Privacy zones can block areas you do not want recorded, such as a neighbor’s window or part of the sidewalk.
Motion limits also help keep the camera focused on your entryway.
Respectful placement reduces disputes and usually improves alert quality.
It also makes the camera easier to live with day to day.
Troubleshoot Common Installation and Performance Problems
Most problems have simple causes, so start with the safest checks first.
Rebooting, re-pairing, and rechecking power or Wi-Fi often solves the basics.
Doorbell not powering on, weak Wi-Fi, or chime not ringing
If the doorbell will not power on, confirm the battery is charged or the wiring is connected correctly.
For wired models, also check the breaker, transformer, and chime connection.
If Wi-Fi is weak, move the router closer, add mesh coverage, or reduce interference.
If the chime does not ring, verify the accessory settings and confirm the chime type is supported.
Motion alerts missing, delayed notifications, or blurry video
Missed alerts can come from a weak signal, poor placement, or motion settings that are too narrow.
Delayed alerts often point to network congestion or slow upload speed.
Blurry video may come from dirt on the lens, low light, or a bad angle.
Clean the lens gently and check whether the camera is too far from the action.
Weather exposure, battery drain, and when to reposition or reset the device
Direct sun, heavy rain, and extreme cold can affect performance, but the exact limits depend on the model.
If the battery drains too fast, check motion frequency, live-view use, and signal strength.
Reposition the device if it keeps catching traffic, glare, or moving shadows.
Reset only after you have tried the safer checks first.
Emergency Notice
A smart security device is not a substitute for emergency services.
In an immediate US emergency, call 911 when it is safe to do so.
Maintenance, Limitations, and Next Steps After Installation
Once the doorbell is installed, a little upkeep helps it stay reliable.
Regular checks also help you catch loose mounts, weak batteries, or changed permissions early.
Cleaning, seasonal checks, and keeping the mount secure over time
Clean the lens with a soft cloth and check the mount after storms or temperature swings.
If the device loosens over time, tighten the hardware before it shifts the camera angle.
Seasonal checks are useful for battery models too.
Cold weather and frequent alerts can shorten the time between charges.
When to consider adding a chime, smart display, or compatible ecosystem device
An indoor chime can help if you do not always carry a phone.
A smart display can also make it easier to see visitors from inside the house.
If you already use a broader smart home system, check compatibility before adding more devices.
For a related comparison, DecatHome’s chime vs. smart speaker guide shows how notification and chime choices can affect daily use.
Knowing the limits of video doorbells for security, privacy, and emergency response
Video doorbells can help you see visitors, track deliveries, and review motion events.
They do not replace good locks, lighting, neighbor awareness, or emergency services.
They also cannot stop every problem, and they may record public areas or create privacy concerns if placed poorly.
Good setup matters as much as the device itself.
Final Takeaway
The best Google Nest Doorbell setup starts with compatibility, safe mounting, and a strong network.
If you are a renter or first-time installer, verify power, privacy, and app access first.
Then follow the exact manual or use a qualified pro when wiring is uncertain.
Not always. Battery models can work without existing doorbell wiring, while wired models need a compatible transformer and chime.
It needs a stable home Wi-Fi connection with enough signal at the front door. Check the exact model manual for supported bands like 2.4 GHz or 5 GHz.
Often yes, but you should check your lease and ask before drilling. Battery models or approved no-drill mounts may be better for renters.
Some basic features may work without a plan, but cloud history and other features can depend on the current subscription. Verify the live plan page for the exact model.
Use motion zones, adjust sensitivity, and aim the camera away from sidewalks or streets when possible. Better Wi-Fi and proper mounting also help.
Check the battery charge, wiring, breaker, and Wi-Fi setup first. If wiring looks damaged or uncertain, stop and use the exact manual or a qualified installer.
Hi, I'm Marcus Sterling, a smart home security expert with over 5 years
of hands-on experience testing and reviewing hundreds of security cameras, smart locks, and alarm systems. My mission is to make smart home security accessible, affordable, and easy to understand—and every review I publish is 100% independent, unbiased, and honest. I don't accept payments for positive reviews, just practical advice to help you secure your home with confidence.
Compare best video doorbell for apartments for home coverage, privacy, power, storage, subscriptions, and value. Read the guide before choosing a system.
View on Amazon Quick Security Answer Cellular backup keeps your alarm connected to a mobile network when Wi-Fi or a landline fails. It works with professional monitoring or self-monitoring, but it requires a data plan and a panel with a good cellular signal. Smart Home Security Guide Understanding what is cellular backup in home alarm…
Quick Security Answer Ring video doorbell recording usually saves motion or press events for later review, but the exact clip history depends on power, Wi-Fi, and plan settings. Homeowners and renters should verify placement, privacy zones, and subscription details before relying on it. Ring video doorbell recording helps homeowners and renters save short video clips…
View on Amazon Quick Security Answer No. Cameras record to local storage without internet, so footage keeps saving during outages. Remote viewing, cloud backup, and app alerts stop until the connection returns. Smart Home Security Guide Do security cameras need internet to record? The short answer is no. Many cameras record to local storage without…
Quick Security Answer The Ring Battery Doorbell Plus is usually manageable for renters and homeowners if you check mounting rules, Wi-Fi strength, and app setup first. The biggest long-term factors are battery upkeep, privacy settings, and whether you need a paid cloud plan. ring battery doorbell plus install is usually a straightforward project for renters…
Quick Security Answer Yes, Nest Doorbell can have a monthly fee if you want cloud video history and some advanced features. Basic live view and alerts may still work without paying, depending on the model and current Google Home plan. Does Nest Doorbell Have a Monthly Fee? The short answer is yes, but not always…


One Comment