If your home already has compatible wiring and solid 2.4 GHz Wi-Fi, setup is usually manageable for a beginner. The main checks are power, chime compatibility, placement, and account security.
Wyze video doorbell v2 installation is usually straightforward for homes that already have doorbell wiring and a stable 2.4 GHz Wi-Fi signal. The main work is checking power, choosing a safe mounting spot, and finishing setup in the app.
Wyze Video Doorbell V2 Installation: What You Need to Know Before You Start
Before you open the box, confirm that your home can support a wired video doorbell. That means checking the existing transformer, chime, wiring, and Wi-Fi. If any of those parts are unclear, slow down and verify them first.
How this guide helps beginners in the U.S. in 2026
This guide is for first-time installers who want a clear, safe path. It focuses on the steps that matter most in U.S. homes, apartments, and townhouses. It also helps you avoid common mistakes that lead to power issues, poor video angles, or privacy problems.
Quick answer: what makes the install easy or difficult
The install is easiest when you already have low-voltage doorbell wiring, a compatible transformer, and strong Wi-Fi near the front door. It gets harder when wiring is old, the chime is unusual, the mounting spot is narrow, or the doorbell must be placed in a rental with rules. For many readers, the biggest challenge is not the app. It is the power check.
Check Compatibility, Power, and Mounting Location First
Check compatibility, power, and mounting location before installing the doorbell.
A good install starts with a compatibility check. Video doorbells need the right power and a place that gives a clear view without pointing into a neighbor’s space. A few minutes here can save a lot of rework later.
Wired doorbell power requirements and transformer basics
Most wired video doorbells depend on low-voltage power from a transformer. The transformer steps household voltage down to a safer level for the doorbell circuit. You should confirm the exact voltage and VA rating in the product manual before wiring.
If your home has an older mechanical chime, check whether the doorbell needs a power kit, connector, or bypass. That small part can affect whether the chime rings correctly. If the transformer rating is unknown, treat that as a stop point until you verify it.
Where the doorbell should sit for best field of view
Mount the unit where it can see faces, packages, and the front approach. In many homes, that means a height near chest level, but the best height depends on your porch, steps, and door frame. The goal is a clear view of visitors without too much sky or sidewalk.
Keep the camera away from strong glare, direct porch lights, and deep overhang shadows. If your doorway is narrow, a wedge or angle mount may help the camera face outward instead of into a wall. That can improve motion detection and reduce false alerts.
Apartment, townhouse, and single-family home considerations
In a single-family home, the main concerns are wiring, weather, and angle. In a townhouse or apartment, shared entrances and property rules matter more. Some renters can install with approval, while others may need a no-drill option or landlord permission.
If the doorway faces a shared hall or public sidewalk, think about privacy before you mount anything. You may need to adjust the view so it covers your entry area without recording too much of a neighbor’s space. For related setup ideas, see our Ring Battery Doorbell Installation Guide and Google Nest Doorbell Installation Guide.
Prepare the Tools, App, and Account Before Installation
Preparation makes the physical install much smoother. Gather your tools, update the app, and confirm your Wi-Fi before you remove the old doorbell. That way, you can finish setup without rushing between the front door and your router.
Tools and materials commonly needed for a clean install
Most installs need a screwdriver, drill, drill bits, wall anchors, a level, and possibly a voltage tester. You may also want electrical tape, a small container for screws, and a phone charger nearby. If the surface is brick, stucco, or uneven siding, you may need extra anchors or a different bit.
Keep the included mounting hardware together. Small parts are easy to lose during a doorbell swap. If the old chime box or wiring looks brittle, stop and inspect before you force anything.
Wyze app setup, Wi-Fi readiness, and account security
Install the app, sign in, and make sure your account recovery options are current. Use a unique password and turn on multi-factor authentication if it is available. That helps protect live video access and device settings.
Also check that your phone has the latest app version and that location, camera, and notification permissions are set the way you want. If you share the home with family members, decide who should have admin access before setup begins. Shared access is easier to manage when you set roles early.
Why 2.4 GHz Wi-Fi matters for setup and reliability
Many video doorbells use 2.4 GHz Wi-Fi because it reaches farther than 5 GHz. That band is often better for front doors, garages, and outdoor walls. It can be slower than 5 GHz, but range matters more for a doorbell camera.
If your router is far away, a mesh node or access point may help. Thick walls, metal doors, and exterior siding can weaken the signal. A weak connection can cause delayed alerts, failed pairing, or choppy live view.
Step-by-Step Wyze Video Doorbell V2 Installation Walkthrough<
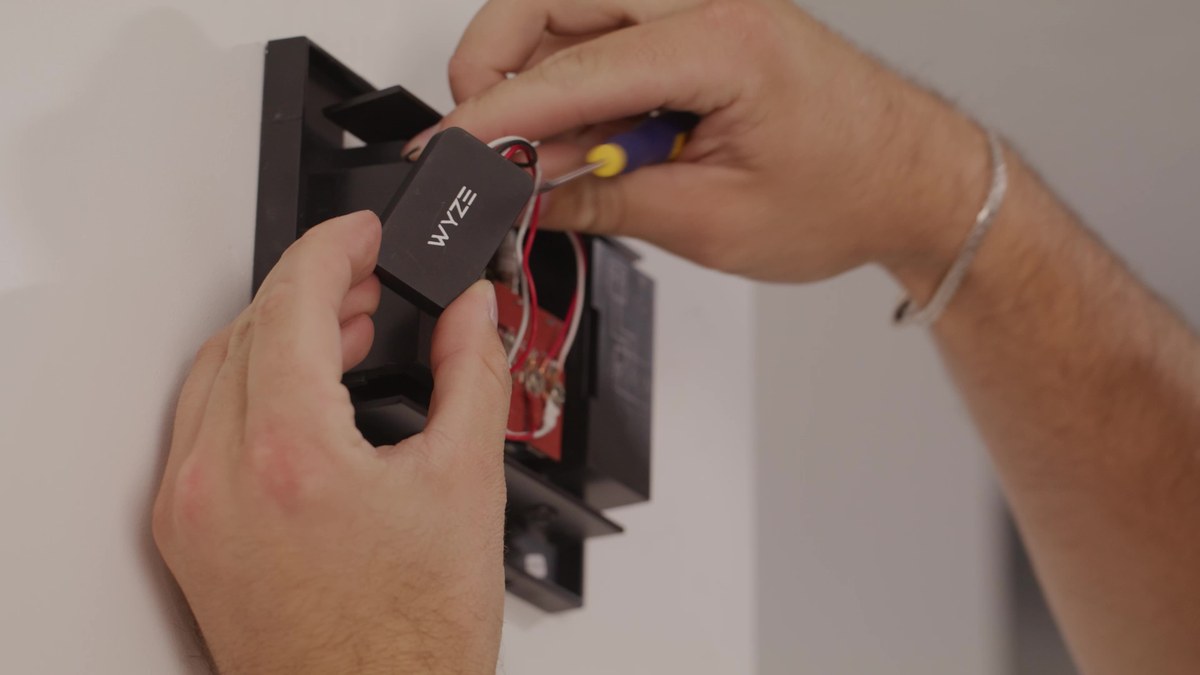
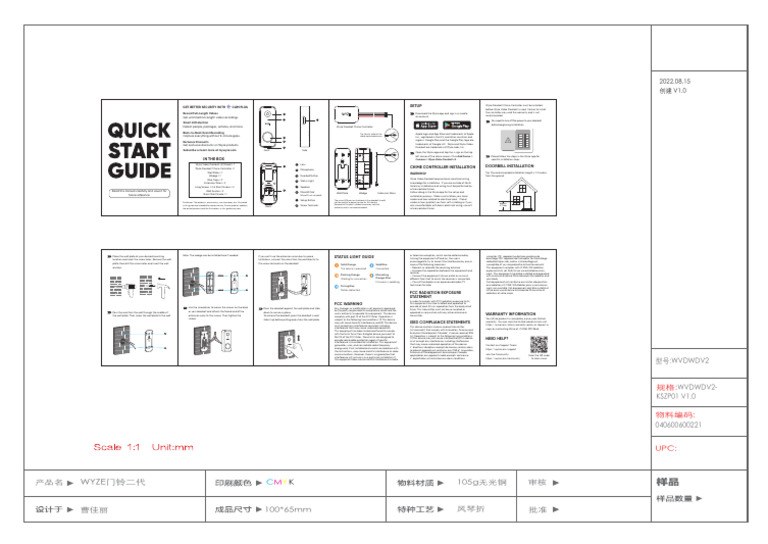
Installation steps for mounting and wiring a Wyze Video Doorbell V2.
The basic process is simple: shut off power, remove the old doorbell, connect the new wires, mount the bracket, attach the doorbell, restore power, and finish pairing in the app. Work slowly and keep each step organized. If something does not match the manual, stop and verify it.
Safely turning off power and removing the old doorbell
Turn off the breaker that controls the doorbell circuit, not just the chime. Then test the old doorbell wires to confirm they are not live. Once you are sure the circuit is off, remove the old button and note how the wires were connected.
Take a quick photo before disconnecting anything. That gives you a reference if the new wiring layout is unclear. Keep the wires from falling back into the wall by taping them lightly in place if needed.
Connecting wires, securing the bracket, and attaching the unit
Attach the wires to the terminals exactly as the manual directs. Do not force a wire under a screw head if it does not fit cleanly. A loose connection can cause intermittent power or a chime that does not ring.
Once the wiring is secure, fasten the bracket and mount the doorbell. Make sure the unit sits flat and does not twist. If the door frame is uneven, use the included wedge or spacer if the manual allows it.
Powering back on and completing device pairing in the app
Restore power at the breaker and wait for the doorbell to start up. Then open the app and follow the pairing steps. You may need to scan a QR code, join a temporary device network, or enter your home Wi-Fi password.
After pairing, test the button, live video, audio, and notifications. Confirm that the chime works if your setup supports one. If the app says the signal is weak, move the router closer or improve the network before you finish.
Placement Tips for Video, Audio, and Neighbor Privacy
Good placement helps you see what matters and avoid unnecessary recording. The right angle improves motion alerts, while the wrong angle can fill your feed with glare, street traffic, or neighbor activity. Small changes often make a big difference.
Adjusting angle, height, and motion zones for better coverage
Start with the camera facing the main approach to your door. Then adjust the height so faces are visible before people reach the threshold. If the camera supports motion zones, narrow the active area to your porch and steps.
Motion zones can reduce alerts from passing cars, trees, and sidewalk traffic. They also help the camera focus on delivery activity. If your entry is deep or angled, test the view at different times of day before you lock in the final position.
Reducing glare, nighttime issues, and false motion alerts
Glare often comes from bright porch lights, reflective doors, or low sun. Try changing the angle slightly or moving the light source if possible. At night, check whether the image is washed out or too dark.
False alerts can come from wind, shadows, pets, or moving branches. Tighten the motion area and reduce sensitivity if the app allows it. A calmer alert feed is easier to trust.
Respecting sidewalks, shared hallways, and neighbor-facing views
In shared spaces, aim the camera only where you need it. That usually means your door, your steps, and your immediate entry path. Avoid pointing at windows, shared seating areas, or long stretches of sidewalk unless you have a clear reason.
Privacy matters for guests, neighbors, and delivery workers. If your camera records audio, be careful with placement near shared walls or common areas. For more on device tradeoffs and setup style, you may also find our Blink Outdoor 4 Vs Video Doorbell comparison useful.
Storage, Alerts, and Subscription Options After Installation
Once the doorbell works, decide how you want recordings stored and how alerts should behave. This affects both privacy and long-term cost. It also shapes how useful the camera feels during daily use.
Local versus cloud storage expectations
Local storage keeps recordings on hardware in or near the home. That can reduce reliance on a subscription, but it may be limited by device support and physical access. If the storage device is damaged or stolen, recordings may be lost too.
Cloud storage saves clips on the provider’s servers. That usually makes remote access easier, but it depends on internet service and account access. It also may require a plan for full event history or advanced features.
Local Storage
Useful when you want recordings kept near the home.
May reduce recurring fees.
Can be limited by device storage and physical access.
Cloud Storage
Useful when you want remote access and event history.
Depends on internet and account access.
May require an ongoing subscription.
What a subscription changes for event history and smart alerts
A subscription can change how long clips stay available and which alerts you receive. It may also unlock person detection, package alerts, or richer event history, depending on the service. Always verify the current plan details before you assume a feature is included.
If you do not want recurring fees, make sure the base device still meets your needs. Some households only need live view and basic motion alerts. Others want searchable history and more detailed notifications.
How monitoring choices affect long-term ownership cost
Video doorbells are not just a one-time purchase. Over time, cost can include accessories, a subscription, replacement parts, and possible installation help. That matters for renters and homeowners alike.
If you are comparing models, look at the full ownership picture, not just the sticker price. A lower upfront cost can become less attractive if the plan is required for the features you want. For a broader pricing context, see our Does Nest Doorbell Have A Monthly Fee guide.
Troubleshooting Common Installation and Connectivity Problems
Most setup problems have simple causes. Start with power, wiring, Wi-Fi, and app permissions before assuming the device is defective. Work through the easiest checks first and stop if anything feels unsafe.
Doorbell not powering on or chime not working
If the doorbell stays dark, check the breaker, wire connections, and transformer compatibility. A loose terminal or wrong power kit can stop the device from starting. If the chime does not ring, confirm that the chime type is supported and wired correctly.
Some systems need a bypass or connector for the chime to work as expected. If the manual calls for one, install it exactly as shown. Do not guess with wiring, especially in older homes.
Weak Wi-Fi, delayed notifications, and setup failures
Weak Wi-Fi often causes delayed alerts or failed pairing. Move the router closer, reduce interference, or add a mesh node near the front of the home. Also check whether your phone is using the correct home network during setup.
If notifications do not arrive, review app permissions, battery saver settings on your phone, and account login status. Sometimes the issue is the phone, not the doorbell. Rebooting the router and restarting the app can also help.
When transformer limits or wiring issues require an electrician
Call a qualified electrician when the transformer rating is unknown, the wiring is damaged, or the chime box looks unsafe. Also stop if the circuit trips, the wires are brittle, or the install requires new low-voltage runs. Those are not good places for trial and error.
Privacy, Cybersecurity, and Ongoing Maintenance for 2026
After installation, the work is not over. You still need to protect the account, manage shared access, and keep the camera clean. Small maintenance steps help the doorbell stay useful and secure.
Using MFA, strong passwords, and secure account recovery
Use a unique password for the app account and turn on multi-factor authentication if available. That adds a second step when someone signs in. It is one of the simplest ways to reduce account takeover risk.
Also review your recovery email and phone number. If those change, update them right away. A locked account can be harder to fix if recovery details are outdated.
Firmware updates, shared access, and app permission hygiene
Firmware updates can fix bugs, improve stability, and patch security issues. Keep the app and doorbell updated when new versions are available. If the device supports automatic updates, confirm that they are turned on.
Review shared users and connected services from time to time. Remove old household members, guests, or integrations you no longer use. The fewer extra permissions you keep, the easier the account is to manage.
Cleaning the lens, checking weather exposure, and seasonal upkeep
Wipe the lens with a soft, dry cloth when the image looks hazy. Check for spider webs, dust, and water spots around the camera window. In wet or dusty seasons, a quick visual check can prevent poor video quality.
Also inspect the mount after storms or temperature swings. Screws can loosen over time, especially on exterior surfaces. If the unit is exposed to harsh weather, confirm that the exact model’s weather rating is appropriate for your location.
Final Takeaway
For most beginners, wyze video doorbell v2 installation is manageable if the home already has compatible wiring, a supported chime, and strong 2.4 GHz Wi-Fi. The safest next step is to verify power and mounting location first, then finish setup with strong account security and a privacy-aware camera angle.
It is designed for wired doorbell power, so you should check your existing transformer and chime before starting. If the wiring is uncertain, verify the manual or use a qualified installer.
2.4 GHz Wi-Fi usually reaches farther than 5 GHz, which helps near front doors and exterior walls. A weak signal can cause pairing failures, delayed alerts, or choppy live video.
Yes, if the property rules allow it and the entry setup supports safe mounting. Renters should check with the landlord or HOA before drilling or changing exterior hardware.
That depends on which recording and alert features you want. Some functions may work without a plan, while cloud history or advanced alerts can require a subscription.
Aim the camera only at your entry area and narrow motion zones if the app supports them. Also review shared users, app permissions, and any recording settings you do not need.
Check the breaker, wire connections, transformer compatibility, and any required power kit or bypass. If the wiring looks damaged or the transformer is unknown, stop and contact a professional.
Hi, I'm Marcus Sterling, a smart home security expert with over 5 years
of hands-on experience testing and reviewing hundreds of security cameras, smart locks, and alarm systems. My mission is to make smart home security accessible, affordable, and easy to understand—and every review I publish is 100% independent, unbiased, and honest. I don't accept payments for positive reviews, just practical advice to help you secure your home with confidence.
Video doorbells can help us see who is outside, answer visitors, and monitor activity near the front door. Most models connect to a phone and offer features such as motion alerts, two-way audio, night vision, and cloud or local video storage. The eufy Video Doorbell E340 is a battery-powered video doorbell with two cameras. One…
The eufy Video Doorbell E340 uses a removable rechargeable battery, so you can charge it indoors without removing the entire doorbell. Its advertised runtime reaches up to six months, but motion activity, video settings, temperature, and camera use can shorten that time. Under normal use, you can expect roughly six to eight weeks between charges,…
Quick Security Answer A good starting height for a Ring video doorbell is usually around 48 inches from the ground. Adjust it for your porch height, steps, Wi-Fi strength, and privacy needs before drilling. Ring video doorbell installation height is usually best when the camera sits about chest level for most visitors, which often means…
Compare ring battery doorbell replacement battery for home coverage, privacy, power, storage, subscriptions, and value. Read the guide before choosing a system.
Setting up the eufy Video Doorbell E340 gives us a clear view of our entryway and phone alerts when someone arrives. We can install it with battery power or connect it to compatible existing doorbell wiring. We can complete the setup by charging the battery, choosing a suitable mounting spot, installing the hardware, and connecting…