Where to Install Glass Break Sensors in Your House
Place glass break sensors on a ceiling or wall with a clear sound path to the protected windows. Stay inside the manual’s rated detection range, usually about 20–25 feet, and test each sensor before relying on it.
Knowing where to install glass break sensors decides if a detector hears a shattered window or stays silent. This guide covers placement rules, room-by-room spots, renter-friendly mounting, monitoring choices, and maintenance for reliable detection.
Where Should You Install a Glass Break Sensor? The Short Answer
Mount the sensor on a ceiling or an unobstructed wall that faces the protected glass. Stay within the detection range listed in the manual, usually about 20–25 feet for acoustic models. A clear sound path matters more than precise aiming.
Ceiling-Centered Placement Covers the Most Glass
Ceiling placement gives an acoustic sensor the cleanest path to every window in the room. A spot near the center keeps the microphone roughly the same distance from each pane. Avoid corners, which push the sensor far from the glass and let furniture block the sound. Measure the distance to the farthest window before you commit to a mount point.
Wall-Mounted Sensors: Aim the Detector at the Window
Wall mounting works when ceiling access is hard or a room has one large window. Place the sensor on the wall that faces the window, not behind it. Many manuals suggest a height that clears furniture. The exact figure varies by model. Acoustic sensors are ears, not eyes, so light furniture rarely blocks them.
Stay Within the 20–25-Foot Detection Range
Most acoustic glass break sensors list their detection range at roughly 20–25 feet. Check the manual for the exact radius and treat it as a maximum, not a guarantee. Mounting height eats into that distance, so measure from the sensor to the farthest pane. Shock sensors mounted on the glass do not use a room-wide range. They protect only the pane they touch. A rundown of the best glass break sensors for home security can help you choose a model. But placement decides if the sensor ever hears a real break.
How Glass Break Sensors Work—and Why Placement Rules Exist

Acoustic sensors listen for the two-stage sound of breaking glass: the impact and the shatter. Shock sensors feel the vibration of the pane itself. Those two technologies follow different placement rules.
Acoustic vs. Shock: Two Sensor Types, Two Positioning Rules
Acoustic models use a microphone tuned to the frequency of shattered glass. They can sit on a ceiling or wall and cover several windows at once. Distant or muffled sounds hurt them, and thick walls stop the pattern entirely.
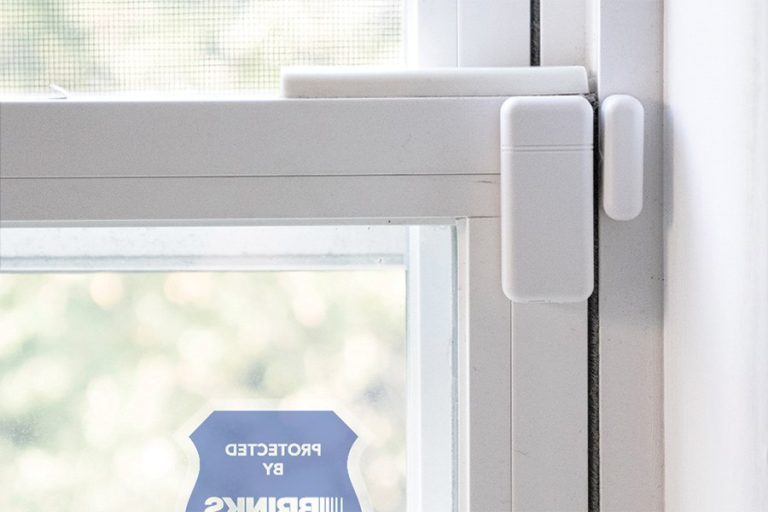
Shock sensors attach directly to the glass or frame. They catch the strike vibration, so they rarely false-alarm on voices or music. The trade-off is coverage: each shock sensor protects only the glass it touches. If you are choosing between the two, our glass break sensor vs window sensor comparison shows the differences.
Detection Field, Line-of-Sight, and Heavy Curtains
The detection field of an acoustic sensor looks like a half-sphere or full sphere around the device. Inside that sphere, a break must sound loud and clear enough to match the sensor’s pattern. Hard floors help with echo. Heavy drapes and thick furniture absorb the high frequencies the sensor needs.
Walls are the main limit. Open doorways let the sound travel. Closed doors block it. Do not expect one sensor to guard a window in the next room unless the door stays open.
Best Placement Room by Room Based on Your Home Layout
The right spot changes with room shape, open doorways, and the type of glass you want to protect. These room-by-room rules cover the most common US home layouts.
Open-Concept Living Rooms and Great Rooms
In an open living room and kitchen, one ceiling-mounted sensor near the center can cover several window groups. Keep it within the rated range of the farthest window. For a very long room, use two sensors and assign them to separate zones in the app. High ceilings eat into horizontal reach, so test the far window before finishing the job.
Bedrooms, Hallways, and Stairwells
In a bedroom, mount the sensor on the ceiling between the windows and the bed, out of reach. Keep nightstands and shelving clear of the area below, since clutter can muffle the microphone.
Hallways rarely need their own sensor. They work best for rooms with doors that stay open. Stairwells follow the same rule: a sensor on the lower landing covers basement glass and entry-door windows.
Sliding Glass Doors, Basement Entries, and Attached Garages
Sliding glass doors are large targets and deserve dedicated coverage. Center a ceiling mount in front of the slider within the rated range. Check the manual for pane-type notes, because laminated and tempered glass can change the detection distance.
Basement entries often have small, low windows. Mount the sensor on the stairwell ceiling or the finished side of the basement, several feet from the glass. For an attached garage window, confirm the sensor’s operating temperature range first. Unheated or uncooled spaces can exceed it.
Where NOT to Install a Glass Break Sensor

Placement mistakes usually fall into three patterns: blocked sound, nearby noise, and wrong distance. Avoid these spots for reliable detection.
Obstructions That Block or Muffle the Breaking Sound
Never mount a sensor behind heavy drapes, inside a cabinet, or above a tall bookshelf. Those spots muffle the high-frequency sound of a break. Dense objects like mirrors, TVs, and thick upholstered furniture also shrink the detection sphere.
HVAC Vents, Speakers, Doorbells, and Pet Noise
Heating vents and air registers create a hiss that can mask the break sound or trigger the sensor. Keep the sensor several feet from any supply vent. Loudspeakers and doorbell chimes produce sharp high-frequency bursts that sensitive sensors can misread. Keep pet beds, crates, and food bowls away from the area under the sensor. Jingling tags sit close to the microphone.
Locations Too Close to or Too Far From the Glass
Manuals list minimum and maximum mounting distances for good reason. Mounting too close can overwhelm the microphone with the impact sound. Mounting too far pushes the glass outside the rated sphere. Mark the window positions and the mount point on the floor with a tape measure before you attach anything.
Renter vs. Homeowner: Mounting, Power, and Hub Integration
Renters and homeowners face different mounting rules, power needs, and hub requirements. Plan around your lease terms and the wiring in your walls.
No-Drill Adhesive Mounts vs. Permanent Screw Installation
Renters should start with peel-and-stick adhesive mounts. Most glass break sensors are light enough for quality double-sided tape on smooth surfaces. Clean the spot with isopropyl alcohol, press firmly for 30 seconds, and use adhesive remover when the lease ends. Homeowners can use screw mounts for a stronger hold on textured ceilings and painted drywall.
Battery-Powered vs. Hardwired Sensors
Most retail sensors run on batteries and need no wiring, though batteries require regular checks. Hardwired sensors connect to a central panel with low-voltage wiring and are usually installed by a licensed alarm company. They cost more to install and are harder to relocate.
Z-Wave, Proprietary RF, and Wi-Fi Direct Hub Compatibility
Compatibility depends on the radio inside the sensor. Z-Wave sensors pair with hubs such as SmartThings and many alarm panels. Proprietary RF sensors work only with their matching ecosystem and bridge. Wi-Fi direct models connect to the brand’s app without a separate hub. Before buying, verify that the exact model pairs with your panel and that the panel supports the sensor’s encrypted communication.
Monitoring, Subscriptions, and the Real Cost of False Alarms
Monitoring choices decide who gets the alert and what happens after a trigger. Think about the difference before you choose a plan.
- The household receives alerts and decides what action to take.
- Usually has lower ongoing cost.
- Does not guarantee emergency dispatch.
- A monitoring center may review eligible alarms.
- Dispatch availability depends on the plan and event.
- Fees, contracts, permits, and false-alarm rules may apply.
Cellular Backup, Local Sirens, and App Event History
With professional monitoring, the panel sends alerts over the internet or a cellular communicator. A cellular backup keeps it online during a broadband outage, often as a paid plan add-on. During an outage, local sirens still sound, but remote alerts may not reach anyone. Where you place the home alarm siren also affects how clearly the alert reaches the household. App event history shows which sensor triggered and when. Check what the app keeps at the free plan level.
Permits, Dispatch Limits, and False Alarm Fees
Glass Break Sensors vs. Indoor Cameras: Privacy Trade-Offs
Cameras record faces, conversations, and daily routines continuously. Glass break sensors react only to the sound pattern of breaking glass. They record no video or speech. That difference matters in bedrooms and living spaces.
If the same room also needs a camera, place it to respect family and neighbors. Before adding one, review the guidance on where you should not put indoor security cameras.
Wi-Fi, Hubs, Firmware, and Account Security
Security devices are only as trustworthy as the network and account behind them. Secure both before relying on a sensor.
2.4 GHz vs. 5 GHz Wi-Fi and Hub Compatibility
Most smart home hubs and alarm panels connect to the 2.4 GHz band because it travels farther through walls. The 5 GHz band is faster but weaker, making it a poor fit for low-power sensors. Confirm which bands the hub or bridge supports and keep it within a reasonable distance of the router.
Firmware Updates, MFA, and Shared User Permissions
Treat a glass break sensor like any other connected device. Update the sensor, hub, and app when releases arrive, use a unique password, and turn on multi-factor authentication. Remove former roommates and service technicians from shared user lists.
Vendor Support Lifecycles and Cloud Retention
Check how long the vendor has supported the model before you buy. A discontinued sensor may stop receiving firmware fixes and app updates while its battery still works. Cloud retention also ties event history and clips to your current plan. Confirm the retention period in writing.
Maintenance, Testing, and Troubleshooting
A glass break sensor needs routine care to stay accurate. Plan a small schedule and stick to it.
Battery Life, Low-Battery Alerts, and Replacement Intervals
Battery life varies by model, temperature, and network traffic. The manual lists the expected range. Replace the battery at the first low-battery alert because a dead sensor looks installed but hears nothing. Use the exact battery type listed.
Weekly Tests, Cleaning, and Sensitivity Adjustments
Run a test through the app or panel every week or two. Test mode ignores real alarms while you play the app’s test sound or tap the included test keychain. Wipe the outer surface with a dry cloth and keep the microphone port dust-free. If sensitivity is adjustable, change it in small steps and test after each one.
Why False Alarms Spike in Winter and Spring
False alerts often climb when heating starts in late fall and when spring storms arrive. HVAC vents create steady noise, while hail and wind rattling loose panes produce sharp sounds near the sensor. Check vents and window seals first. Moving the sensor away from a direct vent usually calms things down.
Final Placement Checklist and Next Steps
Work through a short checklist before you mount anything. A few minutes of measuring prevents most coverage gaps.
Pre-Installation Go/No-Go Checklist
Verify the sensor model, power source, hub, plan, and rental rules before opening the package.
Measure the distance to every window and choose a ceiling or wall spot inside the rated range.
Clean the mounting surface, attach the sensor, insert batteries, and run the first firmware update.
Run test mode, confirm alerts reach the right phones, and schedule battery checks.
When to Call for Professional Installation
Call a licensed installer for hardwired systems. Also call when a monitored plan requires installer activation. Drilling above electrical or plumbing lines needs one too. Vaulted ceilings also justify a professional, since ladder work at height carries real risk. A qualified technician can measure coverage, program zones, and test every sensor as part of the job.
Place glass break sensors on a ceiling or wall with a clear sound path. Stay inside the manual’s rated range. Treat closed doors as coverage boundaries. Every model has slightly different range, minimum distance, and battery rules, so the manual remains the final authority. Test each sensor after mounting and put the next battery check on the calendar.
Frequently Asked Questions
No. Acoustic glass break sensors need an open air path to hear the sound of a break. A closed wall or closed door blocks the pattern, so treat each room as its own coverage zone.
Usually yes, if the room stays within the sensor’s rated range, often 20–25 feet for acoustic models. Long or L-shaped rooms may need a second sensor, and closed doors create separate zones.
It depends on the model. Many sensors pair with a hub or alarm panel over a low-power radio such as Z-Wave, and the hub handles Wi-Fi or cellular connectivity. A few models connect to Wi-Fi directly through the brand’s bridge or app.
Yes, if the sensor works with a hub and app that support free local notifications. Professional monitoring, cellular backup, and long cloud history usually require a paid plan.
Heavy, dense drapes can muffle the high-frequency sound breaking glass produces, and a muffled pattern may not trigger the sensor. Keep several feet of clearance between the sensor and heavy curtains when possible.
Test once a week or at least once a month using the app or panel test mode. Wipe the sensor clean during the test and replace batteries at the first low-battery alert.