How to Choose Security Camera Placement for Driveway
Mount your driveway camera 8 to 10 feet high and angle it down toward the driver’s side of incoming vehicles. Test the view at night, secure the account, and set privacy zones before you finish the install.
Getting the security camera placement for driveway zones right matters more than the camera brand you choose. A well-placed camera catches faces, plates, and suspicious activity. A poorly placed one records nothing useful. This guide covers mounting height, angle, power, Wi-Fi, privacy, and storage. Install once and avoid rework.
The Short Answer: Where to Place a Driveway Security Camera
Mount the camera 8 to 10 feet above the driveway, angled down toward the vehicle. Point it at the driver’s side as the car approaches. Keep a clear line of sight to the license plate zone near the street.
Mount at 8 to 10 Feet, Angled Down Toward the Vehicle
This height keeps the camera out of easy reach. It also gives a natural downward view of the car and the people around it. Aim the lens 15 to 30 degrees below horizontal. A camera pointed straight out captures the sky and trees instead of the vehicle.
Do not mount the camera too high. At 15 feet, faces and plates become too small to identify. At 6 feet, someone can reach it or cover the lens. The 8-to-10-foot range is the practical sweet spot.
Capture the Driver’s-Side Approach and License Plate Zone
US drivers sit on the left side of the vehicle. A camera on the house side of the driveway sees the driver’s face as the car turns in. Place the camera so the plate passes through the frame near the end of the approach. Plates read best when the vehicle slows or stops.
Map Your Driveway Before You Mount Anything
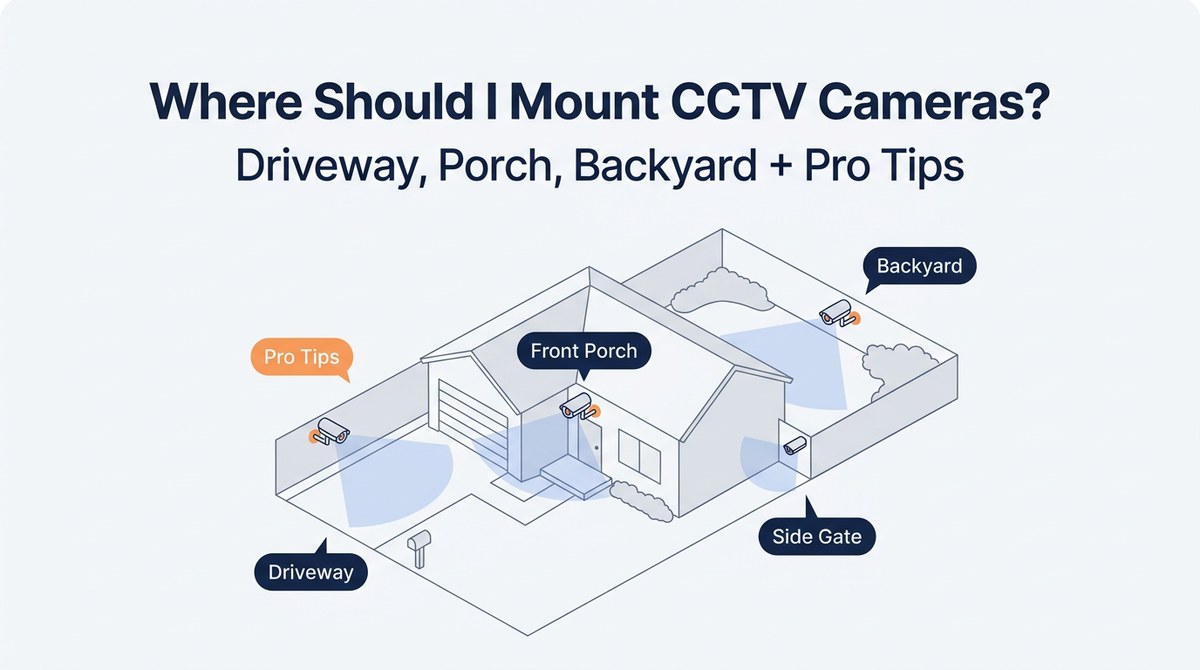
Walk the full length of your driveway before you buy or install. Note the shape, the length, and where vehicles stop. Also note where you can run power and whether Wi-Fi reaches that spot.
Straight, Curved, and Shared Driveways
Straight driveways are the easiest. One camera at the house end can cover the entire lane. Curved driveways hide part of the path from a single lens. You may need a second camera at the curve or a wider lens.
Shared driveways add a privacy layer. Your neighbor uses the same path, so the camera will record them too. Point the camera only at your parking area when possible. When that is not possible, talk to your neighbor before installing.
Soffit, Eave, and Garage Wall Mount Points
Soffit and eave mounts keep the camera dry and out of the way. Garage wall mounts bring the lens closer to the door and plate zone. Wood and vinyl surfaces are simple to drill. Brick and stucco require masonry bits and anchors.
Check the mount area for direct sun. Heat and glare can wash out the image. A slight overhang also keeps rain off the lens.
The Street-to-Door Coverage Path
Think about the full path from street to front door. The driveway camera covers the vehicle. A separate camera or video doorbell covers the door. Together they show the whole approach. This works only if each camera sees its zone without gaps.
Renter vs. Homeowner: How Ownership Changes Placement
Ownership changes how permanent your mount can be. Homeowners can drill and wire. Renters must protect their deposit and follow lease terms.
Drilling, Wiring, and Permanent Mounts
Permanent mounts use screws and often low-voltage wiring. These give the most stable install and a clean look. Renters should check the lease before drilling exterior walls. Some states allow tenants to install security devices. The exact rules vary by state and lease.
Temporary and No-Drill Mounting Options
Renters can use adhesive mounts, clamp mounts, or shelf placement. Battery cameras work well because they need no wiring. Keep the mount within reach for removal at move-out. Set a reminder to recharge the battery before it gets low.
Match Camera Specs to Driveway Shape and Length
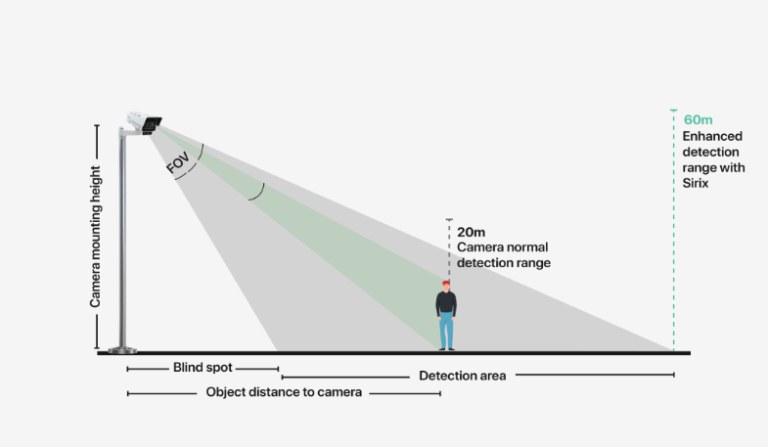
Camera specs matter more than brand. Match field of view, night range, and audio to your driveway’s shape and length.
Field of View and Focal Length
Wide-angle lenses capture more area but make objects look smaller. Most single-car driveways do well with a 110-degree to 130-degree view. A narrower fixed lens sees farther and reads plates better. Long driveways may need a varifocal lens you adjust remotely.
Night Performance: IR Range vs. Driveway Length
Infrared (IR) range tells you how far the camera can see in the dark. Check the manufacturer’s rating against your driveway length. A 30-foot driveway does not need a 100-foot IR range. Color night vision uses ambient light and can show more detail. It may also light up the yard and bother neighbors.
Audio, Two-Way Talk, and Privacy Zones
Many driveway cameras record audio and offer two-way talk. These features help you greet visitors or ask a driver to move. Audio recording is restricted in some states, so verify the local rules first. Privacy zones let you block parts of the frame, like a neighbor’s window.
Power, Wi-Fi, and Hub Placement
Plan power and network before you mount anything. A camera with no signal or no power records nothing.
Wired, Battery, and Solar Power Options
Wired cameras need a nearby outlet or low-voltage wiring. They record continuously and suit busy driveways. Battery cameras install quickly but need recharging every few months. Solar panels help, but they need steady sunlight at the mount point.
Wi-Fi Signal Strength at the Mount Point
Strong Wi-Fi at the mount point is not guaranteed just because your router works inside. Walls and distance weaken the signal. Test the signal with your phone where the camera will sit. Weak signal causes lag, missed clips, and false alerts. Some cameras connect only to 2.4GHz Wi-Fi, while others support 5GHz. Our guide on 2.4GHz vs 5GHz for security cameras explains the difference.
Hub Placement and Local Storage
Cameras that use a hub need that hub within range of both the camera and the router. Place the hub centrally, not in a metal cabinet. Some cameras record to a microSD card or base station. Local storage works without a monthly fee. A thief can also take the device, so keep that risk in mind. Our guide on local storage for security cameras covers the trade-offs in detail.
Privacy, Neighbor Relations, and Legal Limits
Driveway cameras can see beyond your property line. This creates legal and neighbor issues you should handle before mounting.
What You Can and Cannot Record
You can generally record your own property and public areas in video. You cannot record inside someone’s home or other private spaces. Audio recording is a separate issue and is restricted in many states. Check your state and local laws before recording sound.
Privacy Zones and Minimizing Neighbor Capture
Use privacy zones in the camera app to block neighbor windows, porches, and shared walkways. Angle the lens so it covers only your driveway. A camera that stares into a neighbor’s bedroom will cause disputes. It may also break local rules. Our guide on security camera privacy settings shows how to set these zones properly.
Cybersecurity, Storage, and Subscription Choices
Your camera is a connected device. Secure it, or someone else may watch your driveway too.
Lock Down the Camera and Your Account
Use a unique password for the camera account. Turn on multi-factor authentication (MFA). Update firmware when the app prompts you. Remove old shared users and review app permissions. Our guide on how to secure cameras from hackers covers the full process.
Cloud Retention vs. Local Storage
Cloud storage keeps clips safe if the camera is stolen. It usually costs a monthly fee and keeps video for a set number of days. Local storage has no monthly fee, but the card or hub can fail or be stolen. Many cameras offer both. Choose based on your budget and comfort with the cloud.
- No monthly fee for recorded clips.
- Footage stays off the internet.
- Theft or device failure can remove evidence.
- Clips survive camera theft.
- Subscription cost varies by plan and retention.
- Requires reliable internet at the camera.
Alerts, Self-Monitoring, and Professional Monitoring
Most driveway cameras send motion alerts to your phone. You decide whether to check the feed, call a neighbor, or call 911. Some services offer professional monitoring. It is more common with full alarm systems than with single cameras. Self-monitoring is free but depends entirely on you seeing the alert in time.
Installation, Weatherproofing, and Maintenance
The best placement fails if the mount is loose or the lens is dirty. Good installation and simple upkeep keep the camera working.
Mounting Height, Angle, and Weatherproofing
Mount at 8 to 10 feet and angle down 15 to 30 degrees. Seal cable entry points with outdoor-grade sealant. Choose a camera rated for outdoor use, such as one with an IP65 rating. When running new wiring, follow the manual. Call a licensed electrician for anything connected to mains power.
Cleaning, Battery Care, and Firmware Updates
Clean the lens every few months with a soft, lint-free cloth. Rain spots and pollen reduce image quality. Check the battery level monthly in the app. Charge or replace batteries before they hit zero. Install firmware updates when the app prompts you. Outdated software can have known security holes.
Limitations and Next Steps
Driveway cameras help, but they have limits. They do not stop theft or break-ins by themselves. They cannot see through walls or around corners. A single camera, no matter how well placed, cannot cover every side of the property.
Start with one camera at the main vehicle entry point. Set it at 8 to 10 feet, angle it down, and test the view at night. Then add coverage for gaps. Hardwired cameras with a recorder work well for larger properties. The guide on security camera systems with NVR explains that setup in more depth.
The best driveway camera placement is 8 to 10 feet high, angled down at the vehicle approach, with a clear view of the driver’s side and the plate zone. Map your driveway, respect neighbor privacy, secure the account, and maintain the lens.
Frequently Asked Questions
Mount it 8 to 10 feet above the driveway. That height keeps the camera out of reach while still capturing clear faces and plates. Angle the lens down 15 to 30 degrees.
Aim the camera so the plate path passes through the frame as the vehicle slows or stops. A narrow field of view reads plates better than an ultra-wide view. Position the camera on the side of the vehicle where the plate is visible.
In most US states, you can record areas visible from your own property or public spaces, but you cannot record inside private spaces like a neighbor’s home. Use privacy zones in the camera app to block neighbor windows and porches. Check local audio recording rules too.
No. Many cameras record to a microSD card or base station without a monthly fee. Cloud plans add cost but keep clips safe if the camera is stolen. Check the camera’s manual for storage options.
Check the battery level monthly in the app. Charge the camera before it drops below 20%, or add a solar panel if the mount gets steady sun. Cold weather drains batteries faster, so plan for seasonal checks.
Battery cameras keep recording during a power outage, but live viewing and cloud uploads stop if the internet drops. Wired cameras stop when the power is out unless they have battery backup. Local storage still records locally if the camera has power.