How to Test a Home Alarm System Step by Step Guide
Test your alarm every month to catch dead batteries, weak Wi-Fi, and misaligned sensors before an emergency. Switch to test mode with your monitoring provider first so a routine check never triggers a false dispatch.
Knowing how to test a home alarm system keeps your household safe from silent failures. A full test checks sensors, sirens, cameras, locks, backup power, and monitoring alerts. This guide walks through every step in a safe order. It also explains common failures and the fastest fixes. You will finish with a clear test routine you can repeat each month.
What Testing Your Home Alarm System Actually Means
Testing a home alarm system means proving that every connected part does its job. You check doors, windows, motion, glass breaks, cameras, locks, sirens, power, and alerts. The goal is to catch weak points before an actual emergency. A quick monthly test takes less than an hour.
The Quick Answer: A 30-Second Overview of Every Test
Most systems follow the same basic routine. Open each door and window that has a sensor. Watch for the correct chime and app alert. Walk through the path of each motion detector. Trigger the panic button only in test mode. Then confirm the siren and monitoring signal. If any step fails, fix it before moving on.
How Often to Test Sensors, Sirens, and Connectivity
Most manufacturers suggest testing once a month. Some monitoring plans require a monthly test to keep the cellular line active. Test again after storms, power surges, or firmware updates. Batteries also need a seasonal check. A simple calendar reminder prevents most silent failures.
Self-Monitoring vs. Professional Monitoring: What Your Test Needs to Prove
Your test must prove the system can alert the right person. The right person depends on your monitoring setup. Self-monitoring means your phone receives the alert. Professional monitoring means a monitoring center receives the signal too. Know which one applies before you start.
- The household receives alerts and decides what action to take.
- Usually has lower ongoing cost.
- Does not guarantee emergency dispatch.
- A monitoring center may review eligible alarms.
- Dispatch availability depends on the plan and event.
- Fees, contracts, permits, and false-alarm rules may apply.
Test Prep: What to Do Before You Touch the Keypad

Before testing, tell everyone in the house what you are doing. Notify your monitoring provider if you have one. Check local permit rules and false-alarm fees. These steps prevent stress and costly mistakes.
Notify Your Monitoring Provider and Everyone in the House
Call your provider and ask for test mode. Many companies offer this at no charge. Test mode blocks false dispatches while you work. Tell family members so nobody calls 911 by accident. Keep pets in a separate room during motion tests.
Permits, False-Alarm Fees, and US Dispatch Limits
Some US cities and counties require a permit for alarm systems. Repeated false alarms can bring fines. During a planned test, dispatch should be disabled. If your provider does not offer test mode, test at a quiet time. Verify the rules for your address first.
Renter Rules: Lease Terms, Landlord Notification, and Reinstalling Equipment
Renters should check the lease before installing or testing alarm equipment. Some landlords allow self-installed devices only with written approval. Others restrict drilling or hardwired changes. Ask before mounting cameras on walls or replacing door hardware. Keep original parts so you can restore the unit when you move.
How to Test the Control Panel and Entry Sensors
The control panel is the brain of the system. Test its keypad, modes, and panic button first. Then test every door and window contact. A sensor that moved out of alignment is the most common failure.
Arming Modes, Chime, and Panic Button Response
Arm the system in each available mode. Test away mode, stay mode, and night mode. Confirm the keypad chimes when a door opens. Never press the panic button without test mode active. Many panels connect the panic button to emergency dispatch. For more detail, see this guide to the panic button for home alarm systems.
Door and Window Contacts: Correct Technique and Placement
Open each sensor-protected door and window one at a time. Wait a few seconds for the alert. The magnet and contact should stay close when closed. Check the gap in your manual. Most models require the magnet to sit very close, often under an inch. If the gap is larger, the sensor may miss events. Clean the surfaces and re-align the mounts as needed.
Sensor Range, Pet Immunity, and Home Layout Limitations
Every sensor covers a specific area. Entry sensors protect only one opening. Motion sensors cover a pattern, not the whole floor. Pet-friendly sensors ignore motion below a set size. Place them so pets stay below the detection beam. Furniture, plants, and mirrors can block coverage. Test real daily routes instead of clean empty paths.
How to Test Motion Detectors and Glass Break Sensors
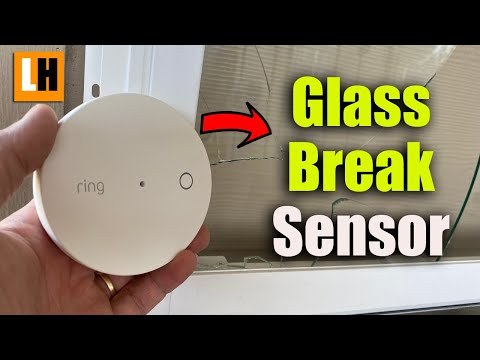
Motion and glass break sensors protect the open spaces between entry points. Test them with a slow walk in normal daily conditions. Heat sources, pets, and curtains can cause false alarms or missed events.
Walk-Test Routes and Heat-Source Pitfalls
Use the app or keypad to put sensors in walk-test mode. Walk slowly across each room the sensor covers. Move from the entry point into the sensor’s view. Repeat the route at a normal speed. Check the panel for a signal each time. Avoid testing near radiators, space heaters, or sunny windows. These heat sources can confuse motion sensors.
Testing Glass Break Without Breaking a Window
Never throw objects at glass to test a sensor. Most systems offer a glass break test mode. Some models play a recorded test sound. Others need a special tester tool that mimics breaking glass. Check the exact manual for your model. A sensor that sits too far from glass often fails even when it works at close range.
What a Failed Motion or Glass Break Test Usually Means
A failed motion test often means the sensor is too far, blocked, or aimed wrong. Heat from a vent or appliance can also confuse it. A failed glass break test often means the sensor sits too far from the glass or behind thick curtains. If the sensor still fails, check the battery first. Compare the symptom with common causes of motion sensor false alarms before replacing the device.
How to Test Cameras, Video Doorbells, and Smart Locks
Cameras, doorbells, and locks add visual and access control to your alarm network. Test their images, audio, night mode, and emergency access. A camera that goes dark or a lock that jams needs attention now.
Camera and Doorbell Checks: Field of View, Night Vision, Audio, and Weather Resistance
Check the live view during the day and again at night. Confirm the camera sees the full entry path, not just the door. Test two-way audio if the model has it. Look for condensation inside the lens or housing. Outdoor cameras should match the local climate rating. Refer to the exact manual before touching wires or mounts.
Privacy Zones, Neighbor Privacy, and Local vs. Cloud Storage
Aim cameras away from neighbor windows and public sidewalks. Use privacy zones to block areas you do not need. Check whether footage saves locally or to the cloud. Cloud clips depend on internet and often a subscription. Local storage keeps data at home but can be stolen or damaged.
- Video stays on an SD card, hub, or network drive inside the home.
- No monthly fee for storage in most cases.
- A thief or fire can take the recording with the device.
- Clips upload to the provider’s service over the internet.
- Plans usually add monthly or yearly cost.
- Access depends on the provider, your account, and the plan terms.
Smart Lock Checks: Fit, Handing, Backup Entry, Auto-Lock, and Shared Access
Test each smart lock with every assigned code or phone. Confirm the bolt moves freely when the door latches. Check backup entry with a physical key before a lockout. Test auto-lock timing so the door does not stay open. Review who has app access and remove old users. If the lock is battery powered, replace batteries before they die.
Verify Connectivity, Power, and Backup Systems
A loud siren with no internet still leaves you blind. Test Wi-Fi strength, cellular backup, and battery power. These systems matter most during outages and emergencies. This step protects your system when the power fails or the router drops connection.
Wi-Fi Strength, Hub Placement, and Supported Bands
Most hubs need a strong signal to reach sensors. Some support both 2.4 GHz and 5 GHz bands. Keep the hub away from metal boxes and thick walls. Use the app to check signal strength in each room. If cameras drop clips, move the router or add a mesh point. Many sensor issues trace back to Wi-Fi, not the sensor itself.
Simulate a Power Loss to Test Cellular and Battery Backup
Tell your provider before you cut power. Unplug the hub or base station for at least 10 minutes. Watch for a cellular signal if the plan includes it. Watch for battery warnings from sensors. Then restore power and confirm the system reconnects. This test shows how long batteries hold during an outage. Understand how cellular backup in a home alarm system works before you rely on it.
App Permissions, Cloud Retention, and Shared User Settings
Open the app and check the security settings. Confirm the account uses a strong password and two-step login. Review which family members have permissions. Check how long clips are kept and who can delete them. Remove devices you no longer own. These steps also lower the risk from common smart-home threats. Review how to secure home security cameras from hackers for camera-specific safeguards.
Confirm Alerts, Sirens, and Professional Dispatch
The final test proves the system can alert people. Confirm push notifications, the siren, and the monitoring call. If any alert stays silent, the system is not doing its job. Run this check while test mode is still active.
Verify Push Notifications Arrive in Test Mode
Trigger a sensor while the app is closed. Count the seconds until the alert arrives. Most apps show the sensor name and time. If alerts arrive late, check Wi-Fi and phone notification settings. Also confirm the phone is not blocking the app.
Siren, Strobe, and Keypad Audible Response Check
Use the app or keypad to sound the siren briefly. Confirm the volume is loud enough to hear from bedrooms. Check that strobes flash if the system has them. Verify the keypad shows the correct zone name. Then silence the alarm and confirm the reset works.
The Monitoring Test Call: What to Say and What to Expect
When the monitoring center calls, say “This is a test.” Give the account name if asked. Tell them the test is complete and no dispatch is needed. Ask them to confirm the signal was received. Write down the result and time in your test log.
Troubleshooting a Failed or Flaky Test
Most failures follow a clear pattern. Start with the simple fixes: batteries, position, and Wi-Fi. If the device still fails, check the manual or contact support. Do not bypass a failed sensor just to silence the alert.
Sensor Not Reporting or Reporting Late
Check the battery first. A low battery causes missed or late alerts. Re-align the contact and magnet. Move the sensor closer to the hub. If it still fails, remove and re-add the device in the app. Late reports usually mean weak Wi-Fi or old firmware.
Silent Siren or Unresponsive Keypad
Confirm the siren is not muted or set to a low volume. Check the keypad backlight and screen for errors. Restart the hub and keypad if the keys do not respond. If the keypad is wireless, check its battery. A dead hub battery can silence the whole system.
Camera Offline, Delayed Clips, or Blurry Night Video
Check the camera’s power cable and Wi-Fi signal. Restart the camera, then the router. Review the upload speed and supported bands. Night blur often comes from a dirty lens or a bright light in view. Adjust the position and clean the glass with a dry cloth.
After the Test: Maintenance and Next Steps
A successful test is the start, not the finish. Update software, log results, and schedule the next test. Long-term care prevents small problems from becoming emergencies.
Firmware Updates, MFA, and Account Recovery Housekeeping
Update the hub, sensors, cameras, and locks after testing. Enable multi-factor authentication on the alarm account. Set a recovery email and phone number. Review third-party integrations like Alexa or Google Home. Remove any integration you no longer use.
Keep a Test Log and Replace Batteries on Schedule
Write down the date and result of each test. Note which sensors passed and which failed. Replace batteries on a set schedule, not when they die. Many sensors run one to two years per set of batteries. Keep spare batteries and basic tools near the system.
Seasonal Re-Tests and Knowing Your Vendor Support Lifecycle
Test again after storms, heat waves, or long trips. Seasonal changes can shift sensors on window frames. Once a year, confirm your devices still receive updates. If the vendor stopped supporting a model, plan a replacement. Ask about the support lifecycle before you buy new gear.
Use one consistent test routine, start with the control panel, and end with the monitoring call. Fix failures at the source rather than silencing them. Log the date, re-test after storms or network changes, and replace batteries on a schedule.
Frequently Asked Questions
Most manufacturers and monitoring providers recommend a full test once a month. Test again after storms, power outages, firmware updates, or changes to your home network.
Yes. Ask the provider to switch your system to test mode so a routine test does not cause a false dispatch. Many providers offer test mode at no charge.
Use the sensor’s built-in test mode or a glass-break tester tool that mimics the sound. Never throw objects at the glass. Check the exact manual for your model.
Heat sources, pets, moving curtains, and placement near vents are common causes. Re-aim the sensor, adjust pet immunity, and clear the area. If the problem continues, check the battery or consider a replacement.
It depends on the system’s battery and cellular backup. Unplug the hub for about 10 minutes while in test mode to check. Confirm that sensors and sirens still report during the outage.
Some US cities and counties require an alarm permit and charge fees for repeated false alarms. Verify the rules for your installation address before testing or relying on dispatch.