How Many Water Leak Sensors Do I Need for Your Home
Most homes need five to eight water leak sensors, while small apartments need three to four. Place them at every sink, toilet, appliance, and water source, then test monthly.
Wondering how many water leak sensors do i need for your home? The short answer is five to eight for most houses. The right number depends on your plumbing, floor plan, and budget, so this guide walks through each room.
The Short Answer: How Many Water Leak Sensors Most Homes Need
Most homes need five to eight water leak sensors. A small apartment can manage with three or four. A large house with three bathrooms, a finished basement, and a water heater in the attic may need ten or more.
Here is a simple starting point:
- Kitchen: 2 to 3 sensors
- Each full bathroom: 2 sensors
- Laundry room: 1 to 2 sensors
- Water heater: 1 sensor
- Basement or crawl space: 1 to 2 sensors
Add one more sensor for each extra risk you find, such as a sump pump, an ice maker line, or a whole-house humidifier. These numbers cover detection only. If you also want to stop the flow of water, a smart shut-off valve changes the equation.
Why the Count Starts With Your Water Sources

Every supply line, drain, and appliance that uses water is a possible leak point. Walk through your home and list each one before buying anything. Your sensor count should match your water sources, not a generic formula.
The Most Common Leak Origins
These are the usual suspects:
- Sinks and faucets: worn washers and loose fittings drip over time.
- Toilets: wax rings, fill valves, and supply lines fail.
- Washing machines: supply hoses burst or detach.
- Dishwashers: door seals, drain lines, and connections leak.
- Water heaters: tanks corrode, and drain pans overflow.
Most of these parts hide behind cabinets or appliances, so a leak can run for hours before you notice it. Each one deserves a sensor nearby.
The Hidden Leak Sources You Probably Forgot
Some leaks come from places people rarely check:
- Refrigerator ice maker lines
- Sump pumps that fail during heavy rain
- HVAC condensate lines that clog
- Whole-house humidifiers
- Water softeners and filtration systems
- Aquariums
Walk behind the refrigerator, look under the water heater, and check the furnace area. If a device uses water, it deserves a sensor.
Room-by-Room: Building Your Sensor List
Go room by room and place one sensor at each likely leak point. For exact placement details, see our full guide on where to place water leak sensors.
Kitchen: Sinks, Dishwashers, and Ice-Maker Lines
The kitchen usually needs two to three sensors. Put one under the main sink near the disposal and drain. Add one behind the dishwasher if you can reach it. Add one behind the refrigerator if there is an ice maker line. Placements that keep the sensor flat on the floor work best, since water travels along the floor before it reaches surfaces you can see.
Bathrooms: Toilets, Vanities, and Shower Valves
Each full bathroom needs at least two sensors. Place one under the vanity and one behind the toilet. Shower valves can leak inside the wall, and there is often no easy sensor spot for that. If you can see the valve from an access panel, add a sensor there.
Laundry and Utility Rooms: Washing Machines and Water Heaters
Laundry rooms need one or two sensors. Washing machine supply hoses are a top leak source, so place a sensor on the floor near the water connections. If the water heater sits in the same room, add a separate sensor beside its drain pan.
Basements, Crawl Spaces, and Attics: Sump Pumps and Condensate Lines
Basements and crawl spaces need one to two sensors. Place one near the sump pump pit to catch overflow. Add one under the HVAC unit where the condensate line drains. Attics with a water heater or furnace also deserve a sensor.
How Home Layout and Construction Change the Number
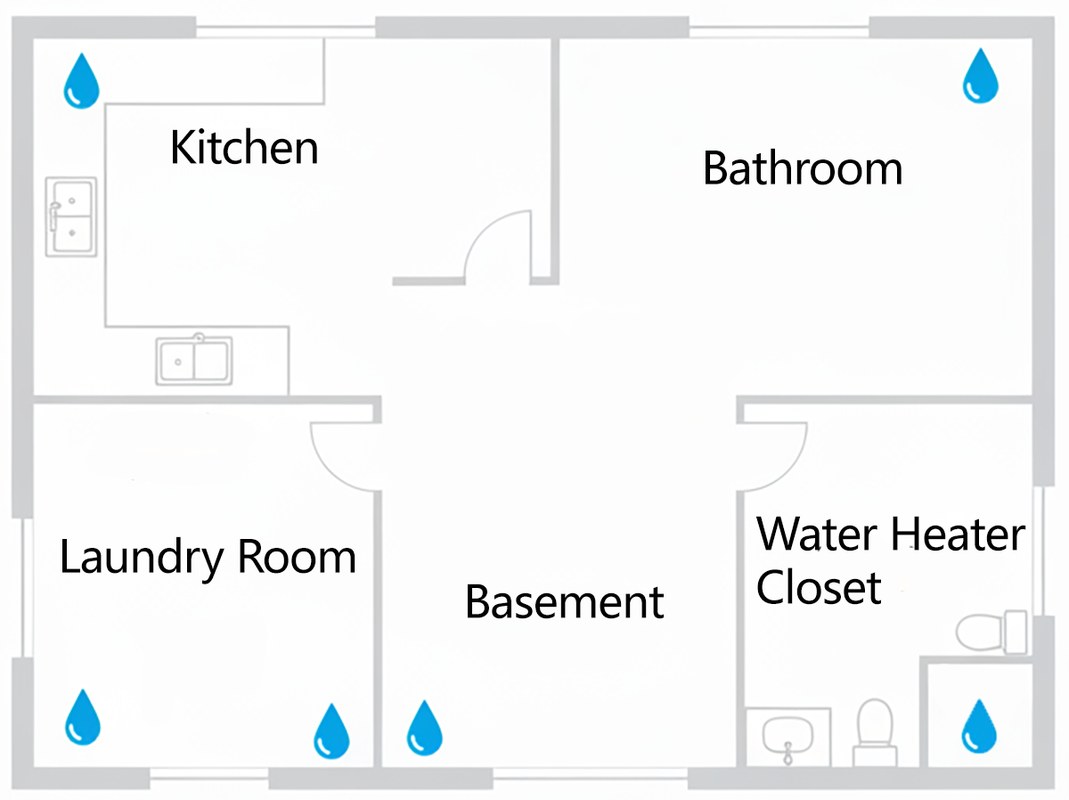
Your floor plan changes the count in four ways:
- Number of floors: a two-story home has more bathrooms and more risk points.
- Foundation type: slab homes hide plumbing in concrete, while crawl spaces expose pipes.
- Finished spaces: finished basements and attics suffer more damage per leak.
- Router distance: sensors far from Wi-Fi may need a hub or range extender.
Multi-story homes need extra thought. A leak on the second floor can damage ceilings on the first floor. If you have rooms above finished living space, each wet room on both levels deserves coverage.
Sensor Type and Connectivity: Why Two Homes Seldom Need Identical Counts
The right sensor type can change how many you need. Some sensors guard a single spot, while others cover a whole wall or appliance run.
Spot Sensors vs. Rope and Cable Sensors
Spot sensors sit in one place, like under a sink. They are small, easy to place, and widely available. Rope and cable sensors run along a longer length, such as under a water heater or along a basement wall. One rope sensor can replace several spot sensors in a straight line.
Smart Shut-Off Valves and In-Line Sensors
A water leak sensor only detects water. It does not stop the flow. A smart shut-off valve closes the main water line when a leak is confirmed. Many systems pair a sensor with a valve to detect and stop water in one step. In-line sensors attach directly to a pipe and spot pressure changes, but they need more plumbing skill to install. Learn more about the difference between a water leak sensor and a water shutoff valve.
Wi-Fi, Hubs, and Battery Power Considerations
Most leak sensors run on batteries that last one to three years. Some connect directly to Wi-Fi, while others need a hub or bridge. Confirm that your network reaches every sensor location before you buy. You can also check whether alarm sensors need Wi-Fi to plan your network.
Renter vs. Homeowner: Different Counts, Different Rules
Renters usually need fewer sensors and fewer changes to the home. Battery-powered sensors that sit on the floor or stick with removable tape work best because they leave no marks.
Homeowners can add wired sensors, shut-off valves, and professional monitoring. Renters should check the lease before installing anything that touches plumbing. Ask the landlord or property manager which devices the lease allows. Some rentals already include leak sensors, and adding your own could conflict with the building’s system.
Monitoring, Subscriptions, and the Real Cost of Adding Sensors
Setup costs vary, but ongoing costs can be near zero for self-monitoring. Some brands charge for cloud history and extra devices.
Self-Monitoring vs. Professional Monitoring
- The household receives alerts and decides what to do.
- Usually has a lower ongoing cost.
- Does not guarantee an emergency response.
- A monitoring center may review eligible alerts.
- Dispatch depends on the plan and event type.
- Fees, contracts, and false-alarm rules may apply.
Subscription Tiers and Cloud Retention Limits
Many basic leak sensors work without a subscription. You get an app alert and a local siren. Paid plans usually add cloud history, multi-device support, and longer retention. Check the plan page for the exact model before buying.
Total Cost of Ownership and Device Lifespan
Battery life also affects cost. Most sensors warn you in the app when power runs low, but replacing batteries once a year adds a small recurring expense.
Privacy, Cybersecurity, and Maintenance That Keeps Sensors Honest
Leak sensors collect little data, but they still connect to your network. Treat them like any smart device: secure the account, update the firmware, and test the sensor.
Sensor Placement, Privacy, and App Permissions
Leak sensors sit in private spaces like bathrooms and basements. They do not record sound or video, but the app still tracks status, location, and battery data. Review app permissions and location sharing when you set up the app.
Account Security: MFA, Shared Users, and Firmware Updates
Testing, Cleaning, and Avoiding False Alarms
Test each sensor once a month. Press the test button or lightly touch the sensor pads with a damp cloth. Confirm the app alert arrives, then dry the pads.
False alarms usually come from steam, spilled water, or a sensor placed too close to a drain. If a sensor sits where condensation is normal, move it a few inches away.
Your Next Step: Turn the Math Into a Buying Plan
Start with your list of water sources, then add one sensor per risk point. Compare models that work with your Wi-Fi, hub, and app preferences. Our guide to the best water leak sensors for smart homes is a good place to narrow your options.
If you are unsure, buy a small starter kit of two or three sensors. Place them in the highest-risk spots, test them, and expand from there.
Your sensor count should follow your water sources, not a fixed rule. Most homes land between five and eight sensors, while small apartments need three or four. Start with the highest-risk rooms, test monthly, and add coverage as your budget allows.
Frequently Asked Questions
A small apartment usually needs three to four sensors. Place one under the kitchen sink, one behind the toilet, and one under the bathroom vanity. Add one near the washing machine if you have one.
Start with the kitchen sink because it sees frequent water use. Add the water heater and washing machine next if you have them.
Many models need Wi-Fi or a hub to send app alerts, though some sound a local siren without a connection. Check the exact model’s requirements before buying.
Most basic leak sensors work without a subscription. Paid plans add cloud history, multi-device support, and longer retention, but they are optional for many models.
Test each sensor once a month. Press the test button or lightly touch the sensor pads with a damp cloth, then confirm the app alert arrives.
Yes. Use battery-powered sensors that sit on the floor or stick with removable tape. Avoid wiring, drilling, or anything that touches plumbing unless the lease allows it.