How to Test a Smart Smoke Detector in 5 Easy Steps
Most smart smoke detectors need a monthly test that checks the siren, sensor, app alert, and battery. Use the app’s test mode first, then validate with canned smoke and confirm the phone notification.
Knowing how to test a smart smoke detector takes about five minutes. A full test shows if the sensor, siren, app alert, and power supply work.
This guide covers the full routine plus troubleshooting, placement, Wi-Fi, subscriptions, privacy, and maintenance.
Still choosing a model? Our guide to the best smart smoke and carbon monoxide detectors can help you compare options.
What a Smart Smoke Detector Test Actually Verifies
A reliable test checks four things: smoke detection, siren sound, app alert, and power.
If any link fails, the device cannot protect your home.
The Four Components of a Reliable Test: Sensor, Siren, Connectivity, and Power
Think of a test as a four-part check:
- Sensor: It must detect smoke particles, not just react to a button press.
- Siren: It must produce a loud, clear alarm people can hear throughout the home.
- Connectivity: It must send a push notification to your phone, hub, or monitoring service.
- Power: It must run on battery, wiring, or a backup that stays dependable.
The test button proves the siren and alert path. It often proves the sensor logic too.
Canned smoke proves the actual detection chamber. The app shows power and network status.
Why Smart Detectors Need a Different Test Routine Than Traditional Alarms
Traditional alarms need a button press and two ears. Smart detectors add Wi-Fi, an app, a hub, cloud accounts, and sometimes monitoring.
A silent siren is easy to notice. A silent app alert is not. So a full routine must check the phone notification and network, not just the sound.
Before You Test: Tools, Timing, and Household Prep
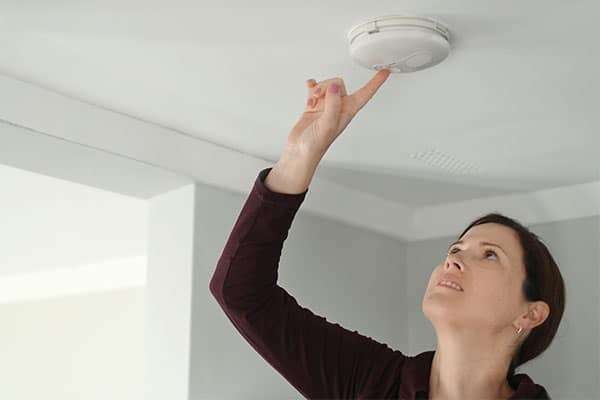
Preparation prevents confusion and false alarms. It also prevents needless dispatch calls.
Spend a few minutes setting up the test. Then the results will be accurate.
Recommended Test Frequency and the Best Time of Day to Test
Most brands recommend a monthly test. Pick a weekday morning when everyone is awake and at home.
Avoid late-night tests. They could startle kids or neighbors.
If you share walls in an apartment, warn the neighbors first. Or test during normal daytime hours.
Tools You’ll Need: Canned Smoke, a Step Stool, and a Second Phone
You need three simple tools:
- Canned smoke: a spray can made specifically for testing smoke detectors.
- A step stool or ladder: to reach ceiling-mounted units safely.
- A second phone: to check the app notification while the alarm sounds.
Do not use real fire, a lighter, or cooking smoke. Real smoke can leave residue on the sensor.
It may trigger alarms across the whole building.
How to Notify Your Household and Avoid Accidental Alarm Dispatches
Tell everyone in the home a test is starting. If the system is monitored, check the app’s test mode. See if it notifies the monitoring center.
Many systems stop dispatch for a set window. Follow the app instructions to avoid false-alarm fees.
How to Test a Smart Smoke Detector in 5 Easy Steps
These five steps cover the button, siren, app alert, sensor, and device health. Do them in order for the best result.
Step 1: Put Your System into Test Mode and Silence Interconnected Alarms
Open the brand’s app. Look for Test, Self-Test, or Hush mode.
This setting silences other detectors. It may also stop dispatch for a short window.
If your system lacks test mode, tell the monitoring company first.
Step 2: Press and Hold the Test Button to Trigger the Siren and Sensor Logic
Press and hold the test button. Hold it for a few seconds or as long as the manual says.
You should hear a loud, clear siren. If the unit is interconnected, confirm every other alarm sounds too.
Step 3: Verify the Push Notification Arrives on Your Phone Within the Expected Window
While the siren sounds, check your phone. The app should send a push notification within a few seconds.
If the alert is missing, check Wi-Fi, app permissions, or notification settings.
Step 4: Use Canned Smoke to Validate Real-World Smoke Detection
Hold the can two to three feet below the detector. Release a short burst. Follow the instructions on the can.
The detector should alarm shortly after.
Do not spray directly into the unit. That can clog the vents. Wipe away any light residue after the test.
Step 5: Check Battery Health, Wi-Fi Signal Strength, and Firmware Version
Open the device status page in the app. Check battery, Wi-Fi signal, and firmware version.
Install any pending firmware update. Check the end-of-life date. That date tells you when to replace the unit.
Troubleshooting: What to Do When Your Smart Smoke Detector Fails a Test

Start with safe, reversible checks. Do not replace anything yet.
Most failures come from network issues, dust, or settings. They are rarely broken hardware.
No App Notification: Wi-Fi, Hub, or Alert Configuration Issues
Check Wi-Fi signal near the detector. Confirm the router is online.
If the detector uses a hub or bridge, reboot that device first. Make sure notifications are on in the app. Also check your phone’s system settings.
Confirm the detector is in the correct home in the app. If the alert still fails, contact the maker. Give them your exact model and firmware version.
Weak or Inaudible Siren: Dust, Hardware, or Audio Output Problems
A weak siren is a safety issue. Clean the vents with a soft brush or vacuum nozzle. Dust can muffle the sound.
Check the manual for a volume setting. If the siren stays weak or silent, replace the detector. A device that fails this badly should not stay in service.
False Alarms and Sensor Drift: Cleaning and Calibration Steps
Older detectors often have sensor drift. That means the sensing chamber becomes too sensitive or less responsive. Dust, humidity, and steam can trigger false alarms.
Clean the vents gently every few months. If false alarms continue, replace the detector. Repeated end-of-life errors also mean replacement.
Placement and Home Layout: Why Testing Alone Can’t Save You
A tested detector in the wrong spot still leaves your home at risk. Location, airflow, and household rules affect real-world protection.
Optimal Ceiling Placement, Dead Air Spaces, and Kitchen Zone Limits
Mount the detector on the ceiling near the room’s center. Keep it at least 4 inches from the wall.
Avoid dead air spaces. These are spots where air stays still and smoke may not reach. Avoid corners, vents, windows, and ceiling fans.
In the kitchen, most brands suggest 10 feet from cooking appliances. Follow our carbon monoxide detector placement guide when your unit combines both sensors.
Renter vs. Homeowner Constraints: Hardwired, Battery-Operated, and Interconnected Systems
Renters often face limits on hardwired changes. Battery-operated smart detectors install without wiring. They usually use removable mounting plates.
If you need to disconnect a hardwired unit, ask the landlord or property manager first.
Homeowners have more freedom to build interconnected systems. But local fire codes still apply. Check what your city requires before you change anything.
Wi-Fi, Hubs, and Smart Home Compatibility: What Integration Changes
A smart smoke detector depends on your network. The wrong band, weak signal, or missing hub can break the app alert. The siren may still work fine.
2.4 GHz vs. 5 GHz Networks, Matter, Thread, and Hub Requirements
Most smart smoke detectors connect over Wi-Fi. Many support only the 2.4 GHz band.
If your router mixes 2.4 and 5 GHz, set up a dedicated 2.4 GHz network. Pairing works better that way.
Newer models may support Matter or Thread. These are newer smart home standards.
They often need a compatible border router. That device links them to your network. Some brands require a hub or bridge.
Check the exact model before you buy or test.
Firmware Updates, Shared Users, and Account Recovery Setup
Firmware is the software built into the device. Updates fix bugs and security issues. Turn on automatic updates if the app offers them.
Add a second trusted user. Then more than one phone gets alerts.
Set up account recovery with a current email and phone number. Test the account again after any password change.
Subscriptions, Professional Monitoring, and Long-Term Ownership Costs
Smart smoke detectors range from free apps to full monitoring. Know what you pay now. Know what you may pay later.
What’s Included in the Free App and What Requires a Paid Plan
Many smart smoke detectors work without a paid plan. The free app usually has live status, test control, push alerts, and firmware updates.
Paid plans may add cloud history, family sharing, or monitoring.
If you want no monthly cost, look for a smart smoke detector without subscription. Confirm what stays free before buying.
Professional Monitoring Contracts, Dispatch Limits, and Permit Requirements
Professional monitoring connects the alarm to a call center. That center can respond when smoke is detected.
Some brands sell it as a monthly add-on. Alarm companies may tie it into a broader plan. Contracts, dispatch limits, and fees vary.
Some US cities require alarm permits. They may charge for repeated false alarms.
Device Lifespan, End-of-Life Alerts, and Future-Proofing Your Setup
Most smoke detectors have a 10-year service life. That includes smart and basic models.
The app shows the end-of-life date. It warns you when that date arrives.
Some models have sealed 10-year batteries. You cannot replace them.
When the device reaches end of life, replace the whole unit. For future-proofing, pick a model that matches your Wi-Fi and hub standard.
Privacy and Cybersecurity: Do Smart Smoke Detectors Spy on You?
Most smart smoke detectors collect only basic status and event data. But features and privacy practices vary by brand. Check your exact model.
Built-in Microphones, Occupancy Sensors, and Data Collection Practices
Most smart smoke detectors do not have cameras or microphones. Their job is to sense smoke and heat.
Some models include motion or occupancy sensors. These detect if a room is in use. They may turn on lights at night.
Read the spec sheet and privacy policy for your exact model. If a device has audio or occupancy features, the app and manual must disclose them.
App Permissions, Cloud Retention, MFA, and Securing Your Account
Review the app permissions on your phone. A smoke detector app should not need your contacts or photo library.
Turn on multi-factor authentication. That adds a second login step. Use a strong, unique password.
The same habits that help secure home security cameras from hackers apply here. Keep firmware updated. Avoid shared accounts.
Change passwords after any device is sold or returned.
Final Maintenance Checklist and Next Steps
Testing once is not enough. A simple schedule keeps the device, battery, and network healthy all year.
Monthly, Quarterly, and Annual Maintenance Tasks for Smart Detectors
Do a monthly button test. Confirm the phone alert.
Every quarter, use canned smoke. Vacuum the vents and check the battery.
Every year, review the firmware. Confirm shared users.
Check the end-of-life date. Replace batteries in units that accept them.
When to Replace Batteries, Clean Vents, and Review Firmware and Alerts
Replace batteries when the app shows a low level. Also replace them when the detector chirps. Do not wait for a monthly test to find an empty battery.
Clean vents at least every three months. Review the alert log after each test.
If anything fails and you cannot fix it, replace the device. Do this before the next monthly test.
Testing a smart smoke detector takes minutes. But only a full routine proves the sensor, siren, app alert, and power work.
Run the button test monthly. Validate with canned smoke. Replace any device that fails.
Check the manual and local rules. Never leave a failed detector in service.
Frequently Asked Questions
Test the siren and app alert once a month. Use canned smoke every three months to verify the sensor. Follow the schedule in your manufacturer’s app.
No. Test mode, push notifications, and battery status are usually free in the brand’s app. Professional monitoring, cloud history, and some advanced features may require a paid plan.
Check Wi-Fi signal, app permissions, and notification settings first. Restart the detector or hub if the model allows. If the alert still fails, contact the manufacturer’s support team.
No. Real smoke can leave residue on the sensor and may trigger other alarms in your building. Use canned smoke sold for detector testing instead.
Most battery-powered and hardwired models with battery backup continue to detect smoke during an outage. Wi-Fi connectivity may drop when the router loses power, so the app alert may not reach you. Check the manual for your model’s backup behavior.
Most collect only basic sensor and status data and have no camera or microphone. Protect the account with a strong password and two-factor authentication, and review the app permissions and privacy policy for your exact model.