Where to Place Smoke Detectors in a House Ultimate Guide
Place smoke detectors in every bedroom, outside every sleeping area, and on every level of the home, including the basement. Mount ceiling units at least 4 inches from the wall and keep kitchen detectors at least 10 feet from cooking appliances.
Knowing where to place smoke detectors in a house is the first step of a fire safety plan. This guide covers the placement rules U.S. safety guidelines recommend. It then moves through room-by-room locations, power options, smart features, renter solutions, and maintenance.
The Short Answer: The Non-Negotiable Smoke Detector Locations
Minimum coverage required by U.S. guidelines
U.S. fire safety guidance calls for smoke alarms in every bedroom. It also requires them outside sleeping areas and on every home level. The basement counts as a level, even if you rarely use it.
The National Fire Protection Association (NFPA) publishes the most widely used placement rules. Most local building codes follow its core guidelines.
Larger homes may need more alarms than the minimum. When in doubt, add a detector to each room people sleep in.
Sleeping areas, every occupied level, and stair paths
Sleeping areas come first because people are least alert while asleep. An alarm outside each bedroom door catches smoke before it reaches a sleeping person. An alarm inside the bedroom adds protection when the door stays closed at night.
Every level needs at least one detector, and stair paths connect them. Smoke rises, so detectors placed above stairs catch the first signal from a lower floor.
Room-by-Room Placement Guide
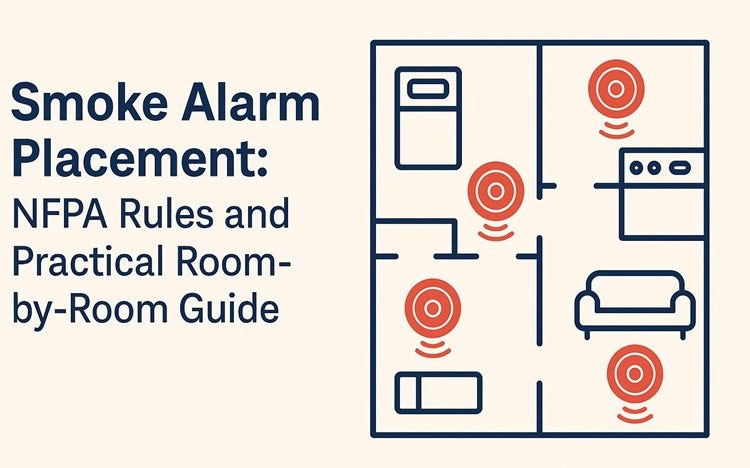
Bedrooms and sleeping hallways: inside or outside the door
Install a detector inside every bedroom used for sleep. Install another in the hallway just outside the bedroom doors. Both positions use the same mounting rule.
On a ceiling, mount the detector at least 4 inches from the nearest wall. On a wall, mount the detector so its top sits 4 to 12 inches below the ceiling. This keeps the sensor out of the corner dead-air space where smoke may not circulate.
Kitchen and living areas: avoiding false alarms without losing coverage
Kitchens produce steam, grease, and cooking smoke. Mount the detector at least 10 feet from cooking appliances when the layout allows. In a small kitchen, place it as far from the stove as practical and expect a few false alarms.
Photoelectric sensors handle cooking smoke better. They still respond to smoke from a real fire. Living rooms and family rooms need ceiling coverage above main traffic paths.
Avoid mounting near heating and cooling vents, windows, or exterior doors. Moving air can delay smoke from reaching the sensor.
Stairs, landings, and split-level transitions
Mount a detector at the top of a stairwell that leads up from the basement. Smoke rises, so the detector at the top of the stairs gets the first signal. For open staircases between floors, the upper landing is the natural spot.
Split-level homes should treat each short run of stairs as a transition point. The one-detector-per-level rule still applies. The upper level becomes the first line of defense for the rest of the home.
Garage, attic, and basement placement limits
The garage is a poor spot for a smoke detector. Temperature swings and car exhaust create constant false alarms. Mount the detector on the wall just inside the house near the garage entry door instead.
Unfinished attics usually do not need a detector unless the space is occupied or used for storage. Extreme heat and cold shorten the sensor’s life. Basements need a detector at the bottom of the stairs, placed away from the furnace and water heater.
Open Floor Plans, Vaulted Ceilings, and Unusual Home Layouts
How ceiling height changes the “dead air” zone
A pocket of dead air sits at the very peak of a vaulted ceiling. Smoke has trouble reaching that exact point. Mount the detector within 3 feet of the peak, positioned a few inches below the highest point.
Flat ceilings take the detector directly on the ceiling. Sloped ceilings follow the same rule. Stay out of the dead-air zone at the peak.
Positioning detectors in great rooms and mezzanines
Great rooms combine kitchen, dining, and living areas under one tall ceiling. The open volume needs its own detector. Mount it near the center of the ceiling or high on a wall.
Mezzanines, lofts, and open galleries act as additional levels. Treat them like floors and add coverage.
Local code or the manual may ask for more than one detector in an open space. Follow the stricter requirement.
Power and Interconnection: Battery, Hardwired, and Smart Detectors
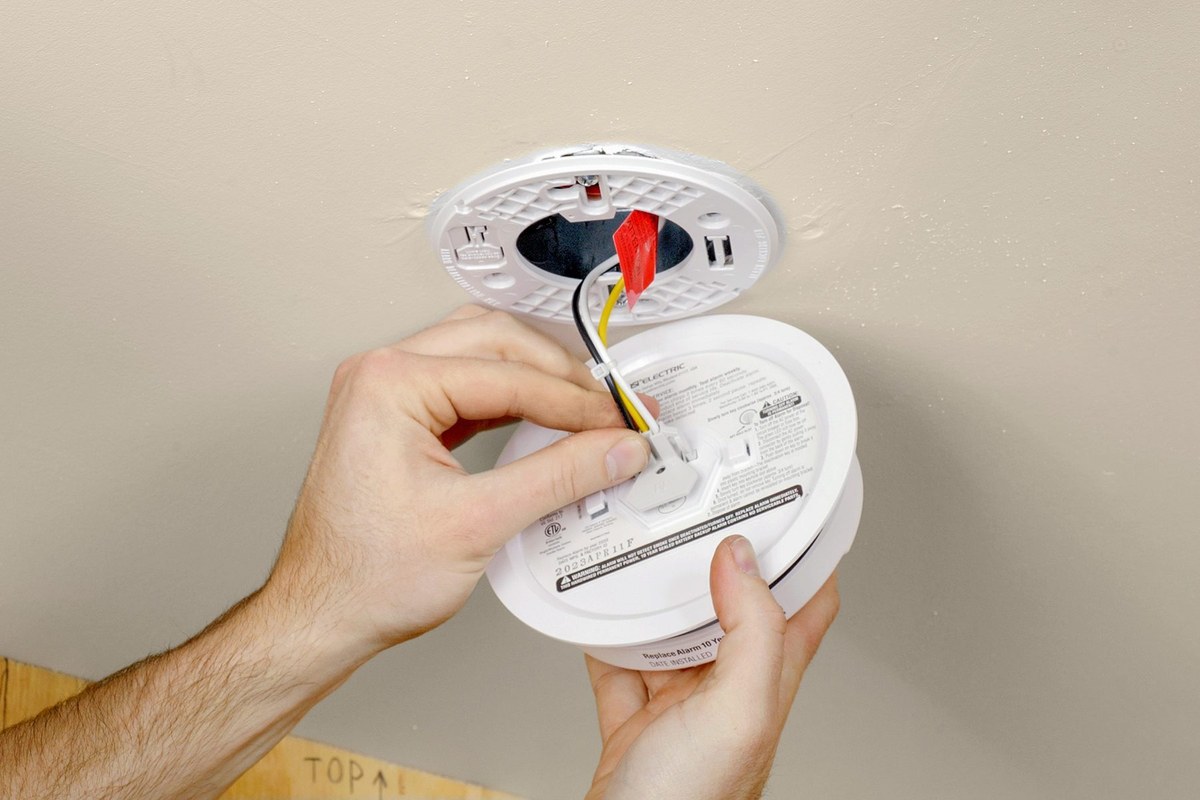
Battery-only vs. hardwired vs. dual-power units
Battery-only detectors need no wiring and install in minutes. Newer models ship with sealed 10-year batteries, so the whole unit is replaced after a decade.
Hardwired detectors connect to home electrical circuits and include a battery backup. That is the standard expectation in newer construction.
| Type | Best suited to | Power | Main limitation |
|---|---|---|---|
| Battery-only | Renters and retrofits | Sealed 10-year or user-replaceable battery | Needs regular testing |
| Hardwired with backup | New construction and remodels | Home electrical circuit with battery backup | Requires wiring work |
| Smart (connected) | Households that want phone alerts | Battery or hardwired plus Wi-Fi | Requires app, network, and updates |
How interconnected alarms create whole-home alerting
Interconnected detectors share a signal. When one detects smoke, every detector in the network sounds. This matters when a fire starts in the basement while the family sleeps upstairs.
Hardwired homes often connect detectors with wires. Wireless interconnect uses radio signals and works well for retrofits.
If your detectors connect to a central alarm system, read where to place a home alarm siren. It explains how audible coverage reaches every floor.
Smart detectors: Wi-Fi bands, hubs, and app setup
Smart detectors add a Wi-Fi radio and an app. When you are away, the app can tell you that a detector is sounding at home. Some models use voice to say which room triggered the alarm.
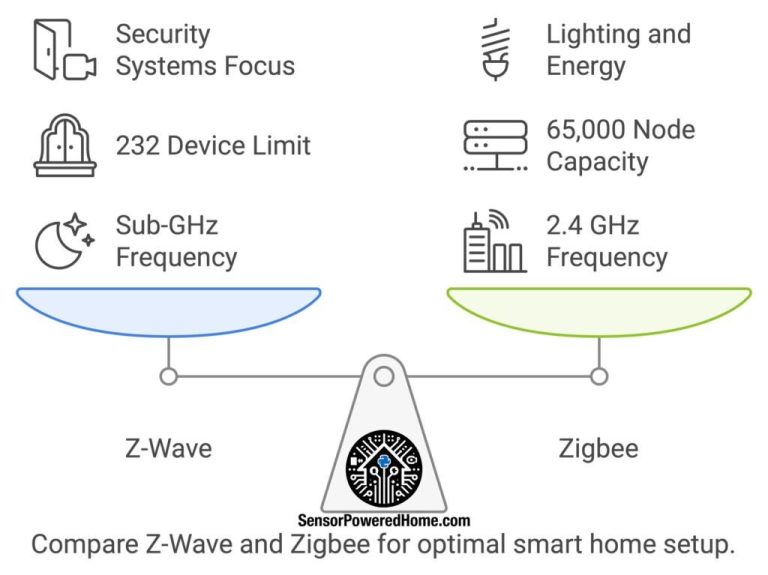
Verify the network requirement before buying. Many smart detectors connect only to a 2.4 GHz Wi-Fi network. Some require a hub or bridge.
Check the exact model’s manual so you know what else you need. For details on current connected models, read the overview of best smart smoke and carbon monoxide detectors.
Renter vs. Homeowner: Installation Constraints and Practical Solutions
Mounting options that don’t damage walls or ceilings
Renters can mount battery detectors with damage-free adhesive strips rated for the detector’s weight. Many manufacturers include or sell mounting kits that use strong adhesive pads instead of screws.
Before sticking anything to a ceiling, check the lease. Some landlords require written approval.
Textured or popcorn ceilings hold adhesive poorly, so screw anchors may be the only safe option. A detector held securely is safer than a detector lying on a shelf.
Landlord responsibilities and tenant rights for existing detectors
Landlord rules vary by state and city. Many jurisdictions require at least one working detector per level and in each sleeping area. Tenants who find a broken detector should request the repair in writing and keep a copy.
Never disable a detector to stop false alarms. If a unit chirps, replace the battery or ask the landlord to replace the unit. Document the request.
Temporary and portable detector options for renters
Battery-only detectors are the practical renter choice. Some manufacturers make compact travel alarms.
These alarms hang on a closet rod or sit on a shelf. Wall or ceiling mounting remains the most reliable setup for a real fire.
Check the manual for placement limits. A travel alarm on a nightstand is better than nothing. But it is not a substitute for a ceiling-mounted detector near the bed.
Wi-Fi, App Alerts, Monitoring, and Subscription Realities
Self-monitoring with phone alerts vs. professional monitoring
Self-monitoring sends alerts to your phone. Your household decides what to do next.
Professional monitoring connects the detector to a monitoring center. The center can verify an alarm and request emergency dispatch when the plan allows.
- The household receives alerts and decides what action to take.
- Usually has lower ongoing cost.
- Does not guarantee emergency dispatch.
- A monitoring center may review eligible alarms.
- Dispatch availability depends on the plan and event.
- Fees, contracts, permits, and false-alarm rules may apply.
False alarms, dispatch limits, and local permit requirements
Burnt toast and shower steam cause most false alarms. If a detector is monitored, repeated false alarms can lead to fees. Some US cities require a permit for monitored alarms.
Check with your local fire department before signing a monitoring contract.
Cloud retention, event history, and subscription costs for smart features
Smart smoke detectors vary on subscriptions. Some brands offer basic phone alerts at no cost.
Others keep event history and multi-device management behind a paid plan. Prices change and vary by model, so check the current plan page before buying.
The guide to smart smoke detectors without subscription explains which features stay free on popular models. A subscription never replaces the detector itself.
The sensor, battery, and placement do the life-safety work. This is true whether or not you pay for cloud features.
Privacy and Cybersecurity for Connected Smoke Detectors
Microphone and sensor data: what a smart detector can capture
Some smart smoke detectors include microphones for voice announcements and hands-free quieting. A microphone in a living room can capture room audio when that feature is active.
Check the app’s permission settings and the model’s manual. This shows whether the microphone can be turned off.
Most smart detectors log alarm events, sensor readings, and battery states rather than continuous audio. Verify the exact model’s data description before setup.
MFA, firmware updates, and managing shared user access
Treat a smart detector like any internet-connected device. Use a unique password for the account, enable multi-factor authentication, and install firmware updates when the app prompts you.
Review shared users once a year and remove anyone who no longer lives in the home.
Vendor support lifecycle and when a detector stops receiving updates
Connected devices eventually lose app support. The sensor can keep detecting smoke for years.
But the app may stop receiving security patches. Alerts may fail after a vendor ends the service.
Set a calendar reminder to check the manufacturer’s support page for your model. If updates have ended, plan to replace the detector before the 10-year limit. Do it sooner if app features matter to your household.
Maintenance, Testing, and Sensor Limitations
The 10-year sensor lifespan and when to replace the whole unit
Smoke detectors are not lifetime devices. Manufacturers and safety organizations agree that smoke alarms should be replaced after 10 years from the date of manufacture.
The date printed on the back tells you the age. Many sealed-battery models signal end of life with a steady chirp pattern.
After a decade, the sensor loses sensitivity even if the test button still sounds. Replacement is the only fix.
Battery chirping, cleaning, and troubleshooting false alarms
A periodic chirp usually means low battery, a loose battery, or end of life. Replace the battery first, then clean the unit. A soft vacuum brush removes dust and debris from the vents.
To cut false alarms, move the detector away from the stove or bathroom door. Steam from showers is a common trigger. If cleaning and repositioning do not help, replace the unit.
What smoke detectors cannot detect: heat, carbon monoxide, and slow smoldering fires
A standard smoke detector does not measure carbon monoxide, natural gas, or heat. Carbon monoxide needs its own detector with different placement rules. Review the dedicated guide to where to place carbon monoxide detectors for the correct spots.
Fast-flaming fires trigger ionization sensors quickly. Smoldering fires produce thick smoke that photoelectric sensors catch faster.
Dual-sensor units combine both technologies, so they are the recommended choice. Even the best smoke detector cannot sense heat. Some homes add separate heat detectors in attics or utility rooms.
Your Next Steps After Placing the Detectors
Testing every unit and coordinating a family escape plan
Test every detector with the test button after installation, then once a month. Replace batteries per the manual. Walk the family through an escape plan.
Plan two ways out of every room. Pick a meeting point outside. Make a rule to never go back inside for belongings.
Practice the plan at night when visibility is low. Show children and guests what each alarm sounds like.
Interconnected systems, permits, and scheduling regular maintenance
If you are remodeling, consider hardwired interconnected detectors. The project may require an electrical permit in your area, so verify local code before starting.
Add fire safety to your calendar. Include monthly tests, battery changes when needed, vacuum cleaning twice a year, and full replacement by the 10-year mark. For smart detectors, check app updates at the same time.
Smoke detector placement follows simple, consistent rules. Put one in every bedroom, outside every sleeping area, and on every level including the basement. Start there, then adjust for kitchens, stairs, vaulted ceilings, and open floor plans.
Verify your existing detectors against this guide. Test them today. Replace any unit older than 10 years.
Frequently Asked Questions
Install one in every bedroom, one outside each sleeping area, and one on every level of the home, including the basement. Larger or open homes may need extra units to cover long hallways and tall ceilings.
Yes, but mount it at least 10 feet from cooking appliances when the layout allows. If the kitchen is small, place the detector as far from the stove as practical and choose a photoelectric model to reduce false alarms.
Yes, the smoke sensing and local alarm still work on battery power during an outage. Away-from-home phone alerts usually require Wi-Fi and may not arrive until the network returns.
Wireless interconnect is a practical retrofit choice and uses the same certified sensors as hardwired units. Hardwired interconnect remains the standard for new construction and follows local electrical codes.
Replace the whole unit after 10 years from the date of manufacture, which is printed on the back. Replace the battery as soon as the low-battery chirp starts, and test the unit monthly.
Yes. Battery-powered detectors with adhesive mounting strips install without screws, but textured ceilings may not hold adhesive. Ask the landlord for written approval and never remove or disable a working detector.