Installing Ring Battery Doorbell Plus is usually a simple DIY project if the Wi-Fi, mounting surface, and app setup are ready. The biggest mistakes are poor placement, weak signal, and skipping privacy or subscription checks.
Installing ring battery doorbell plus is usually a simple DIY job. Still, the details matter. Good placement, Wi-Fi setup, and account settings can affect how well it works.
What Installing the Ring Battery Doorbell Plus Actually Involves
Installing this battery video doorbell means more than mounting a small device by your front door. You need to charge the battery, check Wi-Fi strength, choose a safe height, secure the bracket, and finish setup in the app.
If you want a smooth result, plan for both the physical install and the software setup.
Before You Start: Compatibility, Tools, and Home Setup Checks
Check compatibility, tools, and home setup before installing the doorbell.
Before you drill anything, confirm that the doorbell fits your home and your rules. Battery models are easier than wired ones, but they still need a good mounting surface, a strong wireless signal, and a valid Ring account.
This is also the time to check whether you need landlord approval or HOA permission.
Renter vs. homeowner considerations
Renters should check the lease before drilling or using permanent fasteners. Some properties allow removable mounting methods, while others require written approval.
Homeowners have more flexibility, but they still need to think about siding damage, cable routing, and where the camera points.
Doorframe, siding, and mounting surface limits
The mounting surface should be flat, stable, and able to hold the bracket. Brick, stucco, vinyl siding, and textured trim may need different hardware or a wedge kit.
If the surface is cracked, loose, or uneven, the camera angle and motion detection can suffer.
Wi-Fi, power, and app/account requirements
A battery doorbell still depends on Wi-Fi and a charged battery. Most setups like a 2.4 GHz network because it reaches farther than 5 GHz, but you should confirm the exact model’s network support in the manual.
You will also need the Ring app, a Ring account, and enough phone access to complete pairing.
Step-by-Step Installation of the Ring Battery Doorbell Plus
The basic process is simple. Charge the battery, mount the bracket, attach the doorbell, and finish setup in the app.
Take time with each step. Careful placement and a clean app setup usually matter more than speed.
Charge the battery and prep the device
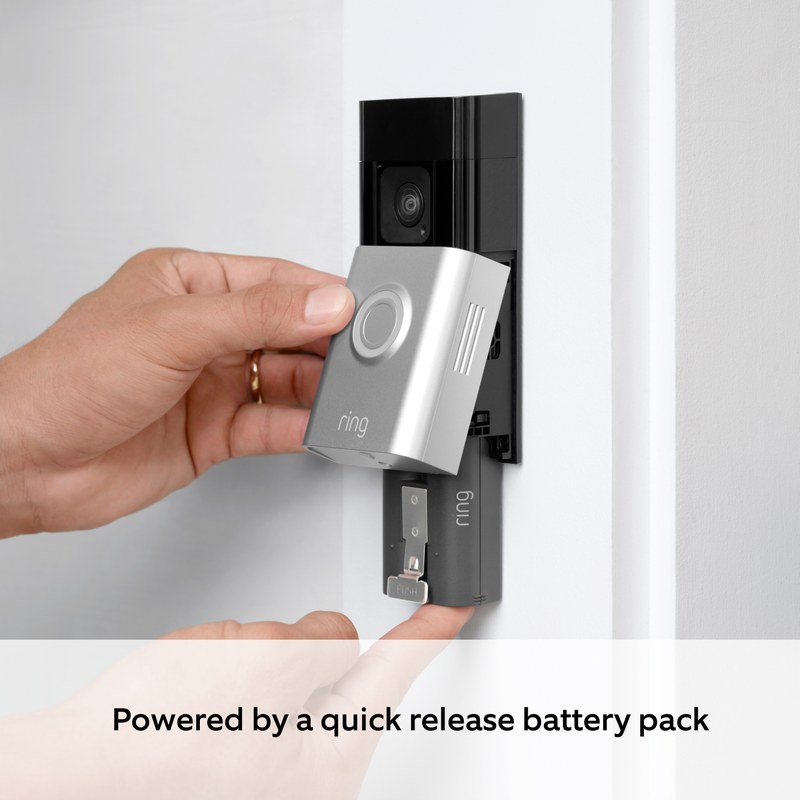
Start by fully charging the battery before mounting. That helps avoid setup interruptions and lets you test the device right away.
Install the battery in the doorbell, power it on, and keep your phone nearby for pairing.
Choose the mounting height and viewing angle
Place the doorbell at a height that gives a clear view of faces and packages. Many doorbells work best around chest height, but the exact placement depends on porch depth, steps, and door trim.
If your doorway is narrow or angled, a wedge accessory may help aim the camera better.
Install the bracket, connect the doorbell, and secure the unit
Hold the bracket in place and mark the screw holes. Drill only where safe, and make sure you are not hitting hidden wiring or damaging fragile trim.
After the bracket is secure, attach the doorbell to the mount and lock it into place according to the manual.
Complete setup in the Ring app
Open the app, add the device, and follow the pairing prompts. During setup, connect the doorbell to Wi-Fi, name the device, and verify alert settings.
Then test live view, motion alerts, and the doorbell button so you know the basics work before you rely on it.
Placement Tips for Better Video, Alerts, and Night Performance<
Place the doorbell at chest height for better video and motion detection.
/h2>
Good placement helps the doorbell see people clearly and avoid noisy alerts. The best spot usually balances face visibility, package coverage, and privacy.
It should also avoid harsh backlighting and direct weather exposure when possible.
Field of view, motion zones, and package detection considerations
Try to aim the camera so it sees the walkway and the front door, not just the street. Motion zones can help reduce alerts from passing cars or pedestrians.
If the porch is deep, you may need to move the camera slightly lower or use an angle kit to improve package coverage.
Lighting, porch layout, and weather exposure
Even a battery doorbell needs decent light for better image quality. A shaded porch can look grainy at night, while strong glare can wash out daytime video.
Rain, direct sun, and extreme temperatures can also affect performance, so check the manual for the model’s operating limits.
Neighbor privacy and avoiding unnecessary recording
Point the camera toward your entry, not a neighbor’s door, yard, or window. Use privacy zones if the app offers them, and avoid placing the unit where it records a public sidewalk more than needed.
This helps reduce complaints and keeps the setup more respectful.
Wi-Fi, Battery Life, and Day-to-Day Maintenance
Battery video doorbells are low maintenance, but not no maintenance. You still need good Wi-Fi, regular charging, app updates, and occasional checks after storms or network changes.
A few minutes of upkeep can prevent many common complaints.
Signal strength, router placement, and 2.4 GHz basics
Battery doorbells often work better on 2.4 GHz because the signal reaches farther through walls. If the router is far away, move it, add a mesh node, or reduce obstacles where possible.
If the app shows weak signal, that is often the first thing to fix.
Battery charging habits and expected upkeep
Battery life depends on motion activity, temperature, live view use, and alert settings. Busy sidewalks and frequent app checking can shorten the time between charges.
A simple routine, like checking battery status weekly and charging before it gets too low, helps avoid downtime.
Firmware updates, app notifications, and routine checks
Keep the app and device firmware updated. Updates can improve stability, fix bugs, and add security patches.
It also helps to review notification settings after updates, because app permissions or phone settings sometimes change.
Storage, Subscriptions, and What You Get Without a Plan
Video doorbells often work in two layers: basic live features and paid storage features. Before you install, it helps to know what the device can do for free and what may require a subscription.
That makes the long-term cost easier to judge.
Live view, alerts, and basic functionality
In many cases, a battery doorbell can still send motion alerts and let you view live video without a paid plan. Exact features vary, so check the current Ring plan page for the model you are buying.
Basic use may still be enough if you only want doorbell alerts and live checks.
Video history, cloud retention, and subscription tradeoffs
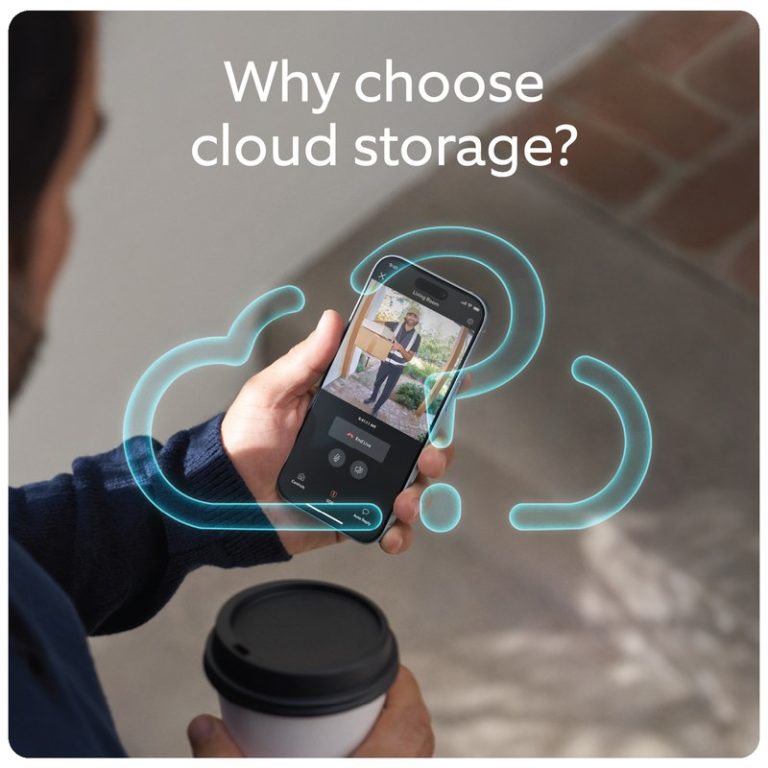
Paid plans usually matter most for recorded video history and longer access to clips. Without cloud retention, you may lose the ability to review events after they happen.
If you care about package theft evidence, guest arrival records, or replaying a missed alert, storage access matters.
Without a Plan$0
Live view and basic alerts may still work
Recorded history may be limited or unavailable
Monthly PlanVerify current price
May add cloud video history and richer event access
Check retention rules and device limits
Annual PlanVerify current price
May reduce monthly cost
Check cancellation and renewal terms
Ownership-cost analysis over time
The real cost is not just the device price. Add the battery, possible wedges or mounts, optional subscription fees, and any installation help.
If your household wants cloud history, the ongoing plan cost may matter more than the upfront hardware price.
Privacy, Cybersecurity, and Shared Access Best Practices
Any connected camera needs careful account handling. The main risks are weak passwords, too many shared users, and settings that record more than you intended.
A few basic habits can lower those risks without making the system hard to use.
Account security, MFA, and recovery settings
Use a unique password for the Ring account and turn on multi-factor authentication if available. Check recovery email and phone settings so you can regain access if you lose your phone.
Also review login activity and remove old devices you no longer use.
Shared users, permissions, and household access
Households often need more than one person to receive alerts or answer the door. Share access only with people who need it, and give the minimum permissions that still work for the home.
If someone moves out or no longer needs access, remove them right away.
Recording etiquette, privacy zones, and local expectations
Doorbell cameras can capture visitors, delivery workers, and passersby. Keep the camera focused on your entry and avoid recording areas where people expect more privacy.
If your home has shared stairs, a sidewalk, or a close neighbor, adjust the angle to reduce unnecessary recording.
Troubleshooting Common Installation and Performance Problems
Most problems come from placement, Wi-Fi, battery charge, or app settings. Start with simple checks before assuming the device is defective.
If the issue involves wiring, unsafe mounting, or a damaged surface, stop and get help.
Mounting issues, alignment problems, and app pairing failures
If the bracket feels loose, the screws may not match the surface. Try a different anchor type or a flatter spot.
If pairing fails, restart the phone, restart the doorbell, and confirm Bluetooth, Wi-Fi, and location permissions in the app.
Weak Wi-Fi, delayed alerts, and missed motion events
Delayed alerts often point to weak signal or network congestion. Move the router closer, improve mesh coverage, or reduce interference from thick walls and metal doors.
If motion events are missed, widen the motion zone or check whether alert settings are too restrictive.
Battery drain, weather-related issues, and when to reset or remount
Fast battery drain can happen with heavy traffic, frequent live view, or cold weather. If the battery drops too fast, review activity, signal strength, and sensitivity settings.
If the doorbell stays unreliable after those checks, a reset or remount may help, but follow the manual before removing hardware.
Installation Difficulty
The job usually takes basic tools, a stable mounting surface, app setup, and some patience. It becomes harder with masonry, rental limits, weak Wi-Fi, or uncertain doorbell wiring.
When the Ring Battery Doorbell Plus Is a Good Fit and What to Do Next
This type of doorbell is a good fit for renters, homeowners, and small-property owners who want a simple front-door camera without wiring work. It is especially useful when you want flexible placement and easy removal later.
It may be less ideal if you need constant recording, more advanced local storage, or a hardwired setup.
Best use cases for renters, homeowners, and mixed-entry homes
Renters often like battery models because they are easier to remove during a move. Homeowners may prefer them for side doors, detached garages, or entryways where wiring is inconvenient.
In mixed-entry homes, the flexible mount can help cover the most-used door first.
When a wired model or different security setup may be better
If you want fewer battery charges, a wired doorbell may be a better fit. If your entry has poor Wi-Fi or a tricky angle, another camera or a stronger network setup may solve the problem more cleanly.
For broader home protection, pair the doorbell with locks, lights, and good exterior visibility.
Final Takeaway
Installing Ring Battery Doorbell Plus is mostly about careful prep, good placement, and clean app setup. It works best for homes that need a flexible front-door camera, but you should verify Wi-Fi, privacy, and subscription needs before you mount it.
It is a battery doorbell, so it does not require hardwiring for basic use. Some homes may still use wiring for charging support or chime features, so check the exact manual.
Many battery doorbells work best on 2.4 GHz Wi-Fi because it reaches farther through walls. Confirm the exact model’s supported bands in the manual before you install it.
Mount it high enough to see faces and low enough to capture package drop-offs. The best height depends on porch depth, steps, and the camera angle.
Basic alerts and live view may work without a plan, but recorded video history often depends on the current subscription structure. Check the current Ring plan page for the exact features tied to your model.
Aim the camera at your entry only, use privacy zones if available, and limit shared access to people who need it. Review audio and video settings before you finish setup.
Start with Wi-Fi strength, router distance, and app notification settings. If signal is weak, improve coverage or move the router closer to the doorbell.
Hi, I'm Marcus Sterling, a smart home security expert with over 5 years
of hands-on experience testing and reviewing hundreds of security cameras, smart locks, and alarm systems. My mission is to make smart home security accessible, affordable, and easy to understand—and every review I publish is 100% independent, unbiased, and honest. I don't accept payments for positive reviews, just practical advice to help you secure your home with confidence.
Quick Security Answer A Ring battery doorbell is usually a practical DIY install for many homes and rentals. The key is to check Wi-Fi strength, mounting rules, and privacy settings before drilling. installing ring battery doorbell is usually a straightforward DIY task for many US homes and rentals. The best result depends on placement, Wi-Fi,…
View on Amazon Quick Security Answer Mount your siren in a central hallway, 8 to 10 feet high, where sound travels best. Keep it visible but out of reach, and test it monthly. Smart Home Security Guide Knowing where to place home alarm siren units is one of the most overlooked steps in a home…
Quick Security Answer Ring battery doorbells usually last from weeks to months per charge, depending on motion activity, settings, weather, and Wi-Fi. The best way to stretch runtime is to reduce unnecessary wakeups and keep the device well placed and well connected. how long do ring battery doorbells last depends on how often they wake…
Quick Security Answer A video doorbell can use very little data when it only sends occasional alerts, or a lot when it records often and you watch live video. Your monthly usage depends most on motion settings, video quality, and how busy the front door is. How much data does a video doorbell use depends…
Quick Security Answer Check power, Wi-Fi, app permissions, and motion settings first. If those are fine, move to placement, storage, privacy, and support. Ring video doorbell troubleshooting usually starts with power, Wi-Fi, and app settings. These three areas cause many common issues. If your doorbell is offline, missing motion alerts, or showing poor video, work…
Quick Security Answer Ring cloud storage is the feature that saves doorbell events online so you can review them later. It is most useful if you want clip history, sharing, and remote access, but it usually adds an ongoing plan cost. Ring video doorbell cloud storage is the part of Ring that saves motion clips…