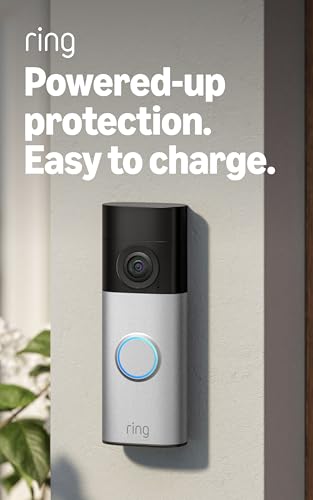
A Ring battery doorbell is usually a practical DIY install for many homes and rentals. The key is to check Wi-Fi strength, mounting rules, and privacy settings before drilling.
installing ring battery doorbell is usually a straightforward DIY task for many US homes and rentals. The best result depends on placement, Wi-Fi, and privacy planning. This guide walks through the setup step by step. It helps you avoid common mistakes and know when to check the manual.
Installing a Ring Battery Doorbell: What You Need to Know First
A battery-powered video doorbell runs without existing doorbell wiring. You charge the battery, connect the device in the app, mount the bracket, and test video, alerts, and motion settings. That makes it a practical option for many apartments, townhomes, and homes where wiring is limited or off-limits.
How the battery-powered setup works
The battery provides power. Wi-Fi sends video and alerts to your phone. Some models can also connect to existing doorbell wiring for trickle charging. That feature is model-specific, so check the exact manual. If wiring is involved and you are unsure, stop and use a qualified installer.
Homeowner vs. renter considerations in the United States
Homeowners usually have more freedom to drill, wire, and move the doorbell. Renters may need written approval from a landlord, property manager, or HOA before drilling into siding, brick, or door trim. If permanent mounting is not allowed, look for a removable setup that still follows the manual.
Before You Start: Compatibility, Tools, and Placement Checklist
Use this checklist before installing the Ring Battery Doorbell.
Before installation, confirm that the doorbell fits your entryway, your network, and your household needs. A few quick checks can prevent weak video, poor motion detection, or a mount that must be moved later.
Doorframe, siding, and mounting-surface checks
Look at the surface where the bracket will sit. Wood trim, vinyl siding, brick, and stucco each need different hardware and care. Make sure the spot is flat enough for a secure mount. It should also be high enough to see faces, but not so high that visitors are cropped out.
Wi-Fi signal, app access, and account setup
Check that the front door has a strong Wi-Fi signal before you drill. Battery video doorbells commonly need a stable 2.4 GHz network. It often reaches farther than 5 GHz. Also confirm that the Ring app is installed, your account is ready, and the person doing setup has the right login access.
Tools, hardware, and battery charge preparation
Most installs call for a drill, level, pencil, screwdriver, and the included mounting hardware. Fully charge the battery before starting. Keep the manual handy, because exact parts can vary by model and wall surface.
Step-by-Step Installation of a Ring Battery Doorbell
The safest approach is to prepare the battery, finish app setup, and then mount the bracket. Do this only after you are sure about placement. Work slowly and keep each step reversible until the final screws go in.
Charge and insert the battery
Charge the battery to full before installation. Then insert it into the doorbell until it clicks into place. If the battery does not seat correctly, do not force it. Remove it and check the orientation in the manual.
Connect the doorbell in the Ring app
Open the app and follow the add-device prompts. You will usually connect the doorbell to your home Wi-Fi and name the device by location, such as front door or apartment entry. Clear naming helps with alerts and shared household access later.
Choose the mounting height and angle
Pick a height that gives a clear view of visitors’ faces and packages near the threshold. For many entryways, the best spot is near chest height for an adult visitor. If your porch is narrow or angled, a wedge or corner kit may help aim the camera better.
If you want a deeper comparison of video coverage and placement tradeoffs, see our guide to Eufy E340 vs Ring Doorbell. It can help you think through field of view and mount style, even if you stay with Ring.
Mark, drill, and secure the bracket
Hold the bracket level, mark the holes, and drill only after you are sure about the angle. Use the correct anchors for the surface. For masonry, siding, or fragile trim, follow the exact hardware instructions rather than guessing. Tighten the bracket so it does not wobble, but do not overdrive the screws.
Attach the doorbell and complete the final test
Snap or screw the doorbell onto the bracket. Then test the live view, motion alerts, and two-way talk. Ring the doorbell from outside and make sure your phone receives the alert. If you have an existing chime connection, confirm that it works only if your exact model supports it.
Getting the Best Video, Audio, and Night Performance<
Settings help improve video, audio, and night performance on the Ring Battery Doorbell.
/h2>
Good installation is not only about mounting the device. It is also about seeing the right area, hearing clearly, and reducing false alerts. Small placement changes can make a big difference in daily use.
Field of view and porch coverage basics
The camera should cover the walkway, door, and package area without pointing too far into the street. If the angle is too wide, you may lose face detail. If it is too narrow, you may miss visitors approaching from the side.
Motion zones, motion sensitivity, and neighbor privacy
Set motion zones so the doorbell watches your entry area, not the sidewalk or a neighbor’s porch. Lower the sensitivity if you get too many alerts from passing cars or pets. Privacy matters here. It also reduces unnecessary notifications.
Night vision, lighting, and glare reduction
Night video works best with some porch lighting. Too much glare from a bright porch lamp can wash out faces. Too little light can make the image noisy. If you can, place the camera so it avoids direct light reflections from glass or glossy siding.
Speaker, microphone, and two-way talk setup
Test the microphone and speaker from both inside and outside the home. Two-way talk is useful only if the audio is clear enough to understand. Background noise, a weak Wi-Fi signal, or a poor mount angle can make conversations hard to hear.
Wi-Fi, Alerts, and Smart Home Connectivity
Once the doorbell is mounted, the next job is making sure it stays connected and useful. That means checking your router placement, notification settings, and any smart home connections you plan to use.
2.4 GHz network requirements and router placement
Many battery video doorbells work best on 2.4 GHz Wi-Fi because it reaches farther through walls. Place the router or mesh node close enough to the front door for a steady signal. If the app shows weak connectivity, try a closer node before assuming the device is faulty.
Notification settings, shared users, and app permissions
Set alert types so you only get the notifications you need. Then review shared users and permissions, especially in family homes or rentals with multiple adults. A clear setup keeps everyone informed without giving unnecessary access.
If you are also thinking about how battery devices behave when their power runs low, our article on what happens if a smart lock battery dies explains the same ownership issue from a different angle. It is a useful reminder that backup planning matters for all battery-powered entry devices.
Voice assistants, hubs, and ecosystem limits
Some video doorbells work with Alexa, Google Home, or other platforms, but the exact features vary. A voice assistant may show a live feed, announce motion, or open a camera view, depending on the device and plan. Check the current compatibility list before you count on it.
Storage, Subscriptions, and Ownership Costs
The upfront price is only part of the cost. You also need to think about recording access, cloud history, replacement batteries, and any optional plan that unlocks video review or event saving.
What works without a subscription
Without a plan, many doorbells still send live alerts and let you answer the door in real time. But event history, clip saving, and advanced features may be limited. The exact free features depend on the model and current plan rules.
Cloud video history, event saving, and plan differences
Cloud storage is convenient because clips are available from the app, even if you are away from home. The tradeoff is that it depends on the account, the internet, and the vendor’s retention policy. If you want a broader look at recording tradeoffs, compare this with our article on Ring indoor cam local storage, which explains how local and cloud options differ.
Local Storage
Hardware can keep recordings on site.
Access may work without a cloud plan.
Physical theft or damage can affect clips.
Cloud Storage
Clips are stored with the provider.
Access depends on your account and internet.
Retention and export rules vary by plan.
Long-term cost factors for renters and homeowners
Renters may spend less on hardware but more on move-friendly accessories or replacement mounts. Homeowners may invest more in extra wedges, chime accessories, or spare batteries. In both cases, the long-term cost depends on whether you need a plan, extra storage, or professional mounting.
Without a Plan$0
Live view and alerts may still work.
Video history and saving may be limited.
Monthly PlanVerify current price
May add cloud history and clip access.
Check device limits and retention rules.
Annual PlanVerify current price
May lower monthly cost.
Check cancellation and renewal terms.
Privacy and Cybersecurity Considerations for 2026
Connected doorbells are only as secure as the account, app, and home network around them. A few basic steps can reduce risk and make recovery easier if you change phones or share access.
Two-factor authentication and account recovery
Turn on two-factor authentication, also called MFA, if the service supports it. Use a unique password that you do not reuse elsewhere. Also save your recovery options, because losing account access can make it hard to view recordings or manage users.
Video privacy zones, neighbor-facing angles, and local laws
Use privacy zones when available to block windows, sidewalks, or neighboring property. Even when a camera is allowed, pointing it into shared or private spaces can create complaints or legal issues. Rules vary by state and city, so check local guidance if the camera sees beyond your own entry.
Firmware updates, password hygiene, and device sharing
Keep the app and device firmware updated. Updates often fix bugs, improve stability, and patch security issues. Review shared users from time to time, especially after a move, a guest stay, or a household change.
Troubleshooting, Maintenance, and When Installation Falls Short
Most problems come from placement, Wi-Fi, or battery care, not from a bad device. Start with simple checks, then move to reset or reposition steps if needed.
Battery drain, weak Wi-Fi, and motion false alerts
If the battery drains fast, check motion settings, live-view use, and Wi-Fi strength. Frequent alerts can also drain power faster. If you get too many false alerts, reduce sensitivity or narrow the motion zone before replacing hardware.
Weather exposure, mounting issues, and seasonal upkeep
Heavy rain, direct sun, and freezing weather can all affect performance. Check the mount after storms and during seasonal temperature swings. Tighten loose screws, wipe the lens clean, and make sure the battery still seats correctly.
When to reposition, reset, or seek professional help
Reposition the doorbell if it misses visitors or records too much street activity. Reset it if the app cannot find the device or the connection keeps dropping. Seek professional help when wiring is unclear, the wall surface is unstable, or the installation requires tools and access you do not have.
Final Takeaway
Installing a Ring battery doorbell is usually manageable for many US homes and rentals if you check the surface, Wi-Fi, and privacy angle first. The safest next step is to follow the exact model manual. Then test alerts, video, and account settings before you rely on it daily.
No, the battery handles power, so existing wiring is usually not required. Some models can connect to wiring for charging or chime support, so check the exact manual before you start.
Many battery video doorbells work best on 2.4 GHz Wi-Fi because it reaches farther through walls. A stronger signal at the front door usually improves alerts and live video.
Often yes, but renters should check lease terms, landlord approval, and HOA rules first. If drilling is not allowed, look for a removable mounting option that still follows the manual.
Live alerts and real-time viewing may still work without a plan, but recording history and clip saving can be limited. Exact included features depend on the model and current plan terms.
Aim the camera at your entry area, not a neighbor’s property or public spaces. Use privacy zones when available and review shared users and permissions regularly.
Start with Wi-Fi strength, router placement, and battery charge. If the problem continues, update the app and firmware, then reset or reposition the device if needed.
Hi, I'm Marcus Sterling, a smart home security expert with over 5 years
of hands-on experience testing and reviewing hundreds of security cameras, smart locks, and alarm systems. My mission is to make smart home security accessible, affordable, and easy to understand—and every review I publish is 100% independent, unbiased, and honest. I don't accept payments for positive reviews, just practical advice to help you secure your home with confidence.
Quick Security Answer A Ring battery doorbell is usually set up by charging the battery, adding the device in the app, and mounting it in a spot with a clear front-door view. The most common problems are weak Wi-Fi, poor placement, or skipped privacy settings. If you want to know how to setup ring battery…
Installing the eufy Video Doorbell E340 takes only a few basic steps, whether we use its rechargeable battery or existing doorbell wiring. We can mount it near the entryway, connect it to the eufy Security app, and adjust its settings for reliable alerts. We can install the E340 with battery power or 16–24 VAC wiring,…
Choosing between the eufy Video Doorbell E340 and S330 depends on how you plan to power, install, and use your doorbell. Both models offer dual-camera coverage, but their storage, hub requirements, and daily features differ. We recommend the E340 for most homes because it works as a standalone doorbell, supports local storage expansion, and offers…
Ring Battery Doorbell 2K Ring Battery Doorbell 4K Choosing between the Ring Battery Doorbell 2K and the Ring Battery Doorbell 4K comes down to a simple question: how much detail do you really need at your front door? Both are battery-powered Ring doorbells with smart alerts, live video, two-way talk, and easy installation. But the…
The eufy Video Doorbell E340 uses a removable rechargeable battery, so you can charge it indoors without removing the entire doorbell. Its advertised runtime reaches up to six months, but motion activity, video settings, temperature, and camera use can shorten that time. Under normal use, you can expect roughly six to eight weeks between charges,…
Quick Security Answer Night vision can make a battery video doorbell far more useful after dark, but only if the porch angle, lighting, and Wi-Fi are solid. For homeowners and renters, the best setup is the one that fits the entryway and the house rules. ring battery doorbell pro night vision helps people get clearer…