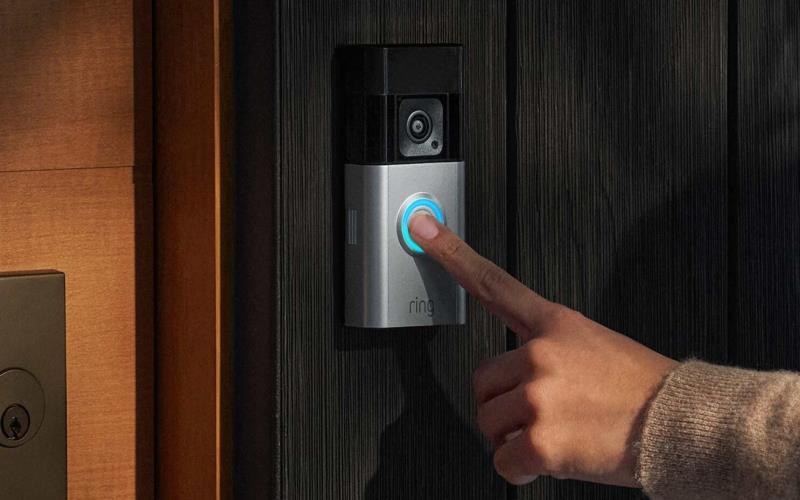
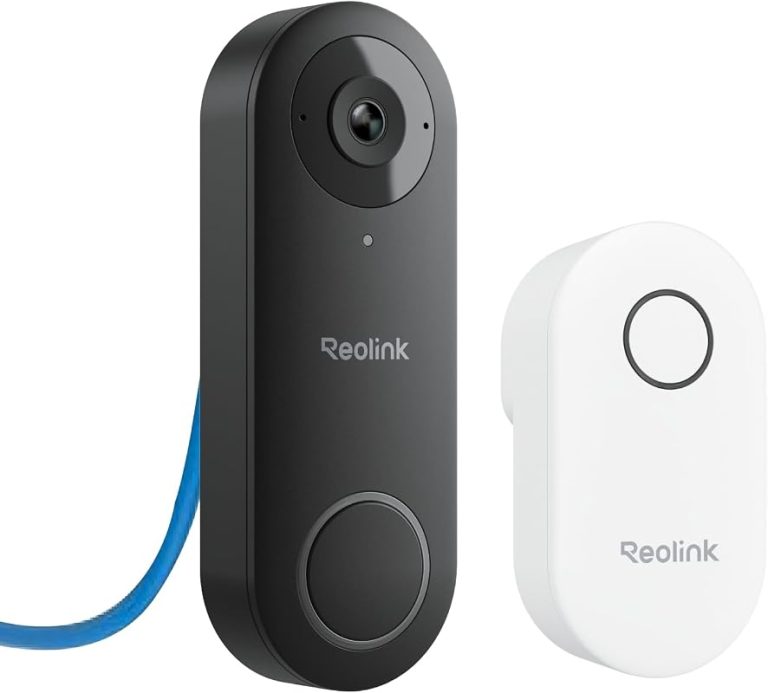
The Ring Battery Doorbell Plus is usually manageable for renters and homeowners if you check mounting rules, Wi-Fi strength, and app setup first. The biggest long-term factors are battery upkeep, privacy settings, and whether you need a paid cloud plan.
ring battery doorbell plus install is usually a straightforward project for renters and homeowners. Start with compatibility checks, safe placement, and a strong Wi-Fi signal. This guide explains the setup in plain English. It helps you avoid common mistakes and know when to stop and get help.
Ring Battery Doorbell Plus Install: What You Need to Know Before You Start
The basic install path is simple. Charge the battery, set up the app, choose a safe mounting spot, connect the device to Wi-Fi, and test alerts. If you rent, you can often use a no-damage approach. If you own the home, you may have more mounting choices. You still need to check the door frame, surface, and network first.
Quick answer: the basic install path for renters and homeowners
Most people can finish setup without special tools. The exact steps depend on the mounting method and the door area. Renters often prefer adhesive or existing-hole options. Homeowners may use screws for a firmer fit. Either way, confirm the manual, charge the battery fully, and test the app before drilling.
What makes the Battery Doorbell Plus different from wired models
A battery doorbell does not need existing doorbell wiring for normal operation. That makes it easier to place in more locations. It also means battery charging is part of routine ownership. Wired models can work differently with power. They may need transformer and chime checks. Battery models focus more on Wi-Fi, placement, and recharge habits.
Installation Difficulty
Expect a light-to-moderate install. The main tasks are charging, app setup, bracket placement, and testing. Drilling, rental rules, and porch layout can raise the difficulty.
Check Compatibility: Door Frame, Mounting Surface, and Wi-Fi
Check the door frame, mounting surface, and Wi-Fi before installing the doorbell.
Compatibility checks save time and prevent damage. Before you mount anything, look at the door trim, siding, brick, or other surface. Then confirm the home’s Wi-Fi reaches the front door. A good install depends on both the physical location and the network.
Rental vs. homeowner constraints and what can be mounted without damage
Renters should check lease terms, landlord rules, and HOA limits before drilling. If drilling is not allowed, use the least invasive option that still holds the device securely. Homeowners have more freedom. Still, they should avoid weak surfaces, hidden wiring, and locations that block the door or screen.
Mounting height, field of view, and porch layout considerations
Doorbells work best when they can see visitors from a useful angle. A common goal is to place the camera high enough to cover faces and packages. Do not place it so high that it misses people close to the door. Porch steps, railings, columns, and screen doors can all change what the camera sees.
2.4 GHz Wi-Fi, signal strength, and router placement near the door
Many battery doorbells rely on 2.4 GHz Wi-Fi for range and wall penetration. That band travels farther than 5 GHz. It can still struggle through brick, metal doors, or thick walls. If the signal is weak, try moving the router, adding a mesh node, or reducing distance from the front entry.
Unbox, Charge, and Prep the Doorbell for Setup
Before installation, fully charge the battery and set up the account in the app. This step is easy to rush, but it matters. Pairing, firmware updates, and user permissions are often smoother when the device is ready first. It also helps you confirm that the home network is working before you drill holes.
Battery charging basics and how long to expect before first use
Charge time varies by battery level, charger type, and the exact model revision. The safest rule is to follow the manual and wait for the battery to reach a full charge before mounting. If you plan to install the same day, start charging early. That keeps you from stopping midway.
App setup, account creation, and device naming for multi-user homes
Set up the device in the app before you mount it if possible. Use a clear device name, such as “Front Door,” so everyone in the household knows which alerts belong to which entry point. In multi-user homes, this also helps reduce confusion when you add shared access later.
Firmware updates, permissions, and enabling multifactor authentication
Check for firmware updates during setup. Updates can improve stability, pairing, and security. Also set a unique password and enable multifactor authentication, often called MFA. MFA adds a second login step. That small step helps protect video access if a password is exposed elsewhere.
Step-by-Step Ring Battery Doorbell Plus Install Process<
Step-by-step installation of a Ring Battery Doorbell Plus on a front door.
/h2>
The install itself is usually a sequence of small tasks, not one big job. Start with the mounting method, mark the location carefully, secure the bracket, and then attach the doorbell. After that, test motion, live view, and notifications so you know the setup works as expected.
Choosing between adhesive, angled mount, or screw mount
Adhesive can work for some renters and smooth surfaces. It may not be ideal for rough brick or hot weather. An angled mount can help when the door faces sideways or a wall blocks the view. Screw mounting is often the most secure choice. It is also the most permanent.
Marking placement, drilling, and securing the bracket
Hold the bracket where you want the camera to sit and check the view in the app if possible. Mark the holes only after you confirm the height and angle. If you need to drill, check for hidden wiring, use the right anchors for the surface, and avoid over-tightening the screws.
Attaching the doorbell and confirming the release-and-lock fit
Once the bracket is secure, slide or click the doorbell into place according to the manual. Make sure it locks firmly and does not wobble. A loose fit can lead to poor alignment, vibration, or a device that is easy to remove by mistake.
Testing motion, live view, and chime/notification behavior
After installation, test the live view from inside and outside the home. Walk through the motion zone and confirm that alerts arrive on time. If your setup includes a chime or connected speaker, test that too. A good install is not complete until the alerts work reliably.
Placement, Visibility, and Neighbor Privacy
Good placement improves usefulness and reduces privacy problems. The goal is to capture visitors clearly while avoiding unnecessary views of sidewalks, neighboring porches, or shared spaces. Small changes in angle or height can make a big difference in what the camera records.
Optimizing head-to-toe coverage and motion detection zones
Try to place the camera so it can see both faces and packages. That often means aiming slightly downward without pointing too far at the ground. Motion zones can help focus alerts on the area you care about most. They can also reduce false alerts from passing cars or people on the sidewalk.
Night performance, porch lighting, and glare reduction
Night performance depends on lighting, reflections, and the camera’s low-light behavior. A bright porch light can help. Direct glare from a fixture or reflective glass can hurt the image. If the picture looks washed out, adjust the angle or move the light source if possible.
Using privacy zones and avoiding views of sidewalks or neighboring property
Privacy zones let you block parts of the image you do not want recorded. That is useful when your door faces a public walkway, a shared driveway, or a neighbor’s window. You should also review audio settings and household sharing so only the right people can view clips.
Power, Battery Life, and Maintenance Expectations
Battery doorbells shift the work from wiring to upkeep. You will need to recharge the unit, watch for weather effects, and clean the lens from time to time. How often that happens depends on motion activity, live view use, temperature, and notification settings.
How usage patterns affect battery runtime
Frequent motion events and repeated live view checks usually shorten battery life. A busy front porch can drain power faster than a quiet entry. Settings also matter. Stronger motion sensitivity, longer recording windows, and more alerts can all increase battery use.
When to recharge, cold-weather impacts, and seasonal upkeep
Recharge the battery before it gets too low, not after the doorbell stops working. Cold weather can reduce battery performance, so winter may bring shorter runtime than mild seasons. It helps to check the battery before travel, holidays, or long stretches when you may not be home.
Cleaning the lens, checking seals, and weather exposure limits
Wipe the lens gently with a soft cloth when dirt or pollen builds up. Also check that seals, covers, and mounting points still look snug after storms. For weather exposure, rely on the exact model’s manual and rating rather than assuming all outdoor devices handle the same conditions.
Subscriptions, Storage, and Monitoring Choices
Battery doorbells often work in a limited way without a plan, but the details vary by brand and model. Before you buy, check what is included for live view, event history, cloud storage, and sharing. The monthly cost can matter more over time than the device price itself.
What works without a subscription and what features are paywalled
Some features may work without a plan, such as basic alerts or live view, while other features may require paid storage or advanced event history. Because plans change, always verify the current feature list before you rely on a free tier. Do not assume every function is included.
Cloud video retention, event history, and shared access limits
Cloud storage usually means recordings are saved on the provider’s servers for a limited time. That can make playback easy, but it also means account access matters. Check how long clips stay available, how many users can share access, and whether exports or deletions are simple.
Self-monitoring versus any optional monitoring-related services
Most video doorbells are used for self-monitoring, which means the household decides what to do after an alert. Some ecosystems offer optional monitoring-related services, but the exact terms vary. If any service claims emergency help, read the current plan details closely and verify what it actually covers.
Local Storage
Can keep video on a device or hub you control.
May reduce monthly fees.
Still needs backup and physical security.
Cloud Storage
Stores clips through the provider’s account system.
Depends on internet and subscription terms.
Access and retention are controlled by the service.
Troubleshooting, Cybersecurity, and Ownership-Cost Considerations
Most problems have simple causes, such as weak Wi-Fi, a low battery, or a missed pairing step. Start with safe checks first. If the issue involves wiring, unstable mounting, or repeated setup failures, stop and review the manual or call for help.
Common install issues: weak Wi-Fi, motion misses, battery drain, and app pairing errors
If pairing fails, confirm the app permissions, Bluetooth or phone settings if required, and the correct network password. If motion is missed, adjust the angle and detection zone before changing anything else. If battery drain seems high, look for frequent live view use, heavy traffic, or a poor signal.
Account recovery, shared-user permissions, and protecting video access
Use a strong password, keep recovery details current, and review who has access to the account. Shared-user permissions should match the household’s needs. If someone moves out or no longer needs access, remove that user right away and check for connected services or integrations.
Upfront cost vs. long-term subscription and maintenance expenses
The true cost includes more than the device. Add any mount accessories, replacement batteries or charging time, and possible subscription fees. If you compare options, look at the first-year cost and the cost after that, because cloud plans can change the total a lot.
Warranty, Returns & US Support
Limited warrantyVerify current term
Retailer return windowVerify current days
US supportVerify current channels and hours
Replacement partsVerify current availability
For a broader setup comparison, see Eufy E340 vs Ring Doorbell. It helps explain how battery doorbells differ in power and storage choices. If you are deciding between camera styles, Blink Outdoor 4 vs Ring is useful for understanding battery-based monitoring tradeoffs. And if you want a related setup example, Eufy Video Doorbell E340 guide covers another doorbell installation path.
Final Takeaway
A ring battery doorbell plus install is best for people who want a flexible front-door setup without existing wiring. The main limits are battery upkeep, Wi-Fi quality, privacy choices, and any paid storage features, so verify those details before you mount the device.
No, it is a battery-powered doorbell, so normal operation does not depend on existing doorbell wiring. You still need a strong Wi-Fi signal and a charged battery.
Many battery doorbells use 2.4 GHz Wi-Fi because it reaches farther through walls. Check the exact manual for the supported band and confirm the signal at your front door before mounting.
Often yes, if the surface and building rules allow a no-damage method. Check your lease or landlord rules first, and make sure the mount still holds the doorbell securely.
That depends on the current plan terms. Some features may work without a paid plan, but cloud recording, event history, or longer retention may require a subscription.
Reduce unnecessary motion events, avoid frequent live view checks, and keep the Wi-Fi signal strong. Cold weather and heavy front-door traffic can shorten runtime.
Use a unique password, enable multifactor authentication, and review shared users and connected services. Remove access for anyone who no longer needs it and keep recovery details current.
Hi, I'm Marcus Sterling, a smart home security expert with over 5 years
of hands-on experience testing and reviewing hundreds of security cameras, smart locks, and alarm systems. My mission is to make smart home security accessible, affordable, and easy to understand—and every review I publish is 100% independent, unbiased, and honest. I don't accept payments for positive reviews, just practical advice to help you secure your home with confidence.
The eufy Video Doorbell E340 supports several chime options, but compatibility depends on the setup you choose. You can use an existing wired chime, a compatible eufy add-on chime, supported HomeBase models, Alexa devices, or Google Assistant devices. For the simplest wireless setup, use the official eufy Add-On Chime, while wired installations require a 16–24…
View on Amazon Quick Security Answer A no-monthly-fee alarm system uses a local hub, sensors, and your phone instead of a paid monitoring plan. You take on alerts and dispatch decisions, but you avoid recurring fees. Smart Home Security Guide An alarm system without monthly fee gives you security hardware without a recurring contract. You…
Find the best security cameras without subscription for indoor and outdoor use. Compare local storage, battery options, and no-fee alerts for US homes.
Compare best wired video doorbell by security features, privacy, smart home fit, setup, fees, and value. Read the guide to find the right option for your home.
Compare commercial grade video doorbells for home coverage, privacy, power, storage, subscriptions, and value. Read the guide before choosing a system.